Happiness Project#72: Carrot Cake Pops!

carrotc

Valentines Day. Most of you know how I feel about Valentines Day. I’m not a believer. For many reasons, though mostly because of how disturbingly commercialized it is (in the US, at least). No matter my many disagreements with this specific day though, I do, however believe in love. Real love. That’s shown and celebrated, in no matter how small or grand a way, every day. And is no more or less significant because of any “holiday.”

So while standing firm in my own beliefs on love & relationships, I finally had the time to re-create one of my favorite cakes into what I call a “messy” cake pop treat. Because, well, I LIKE being a messy baker. It’s kinda freeing in this way. And fun. WAY more fun! My Chloe Girl agrees, wholeheartedly. Ha.

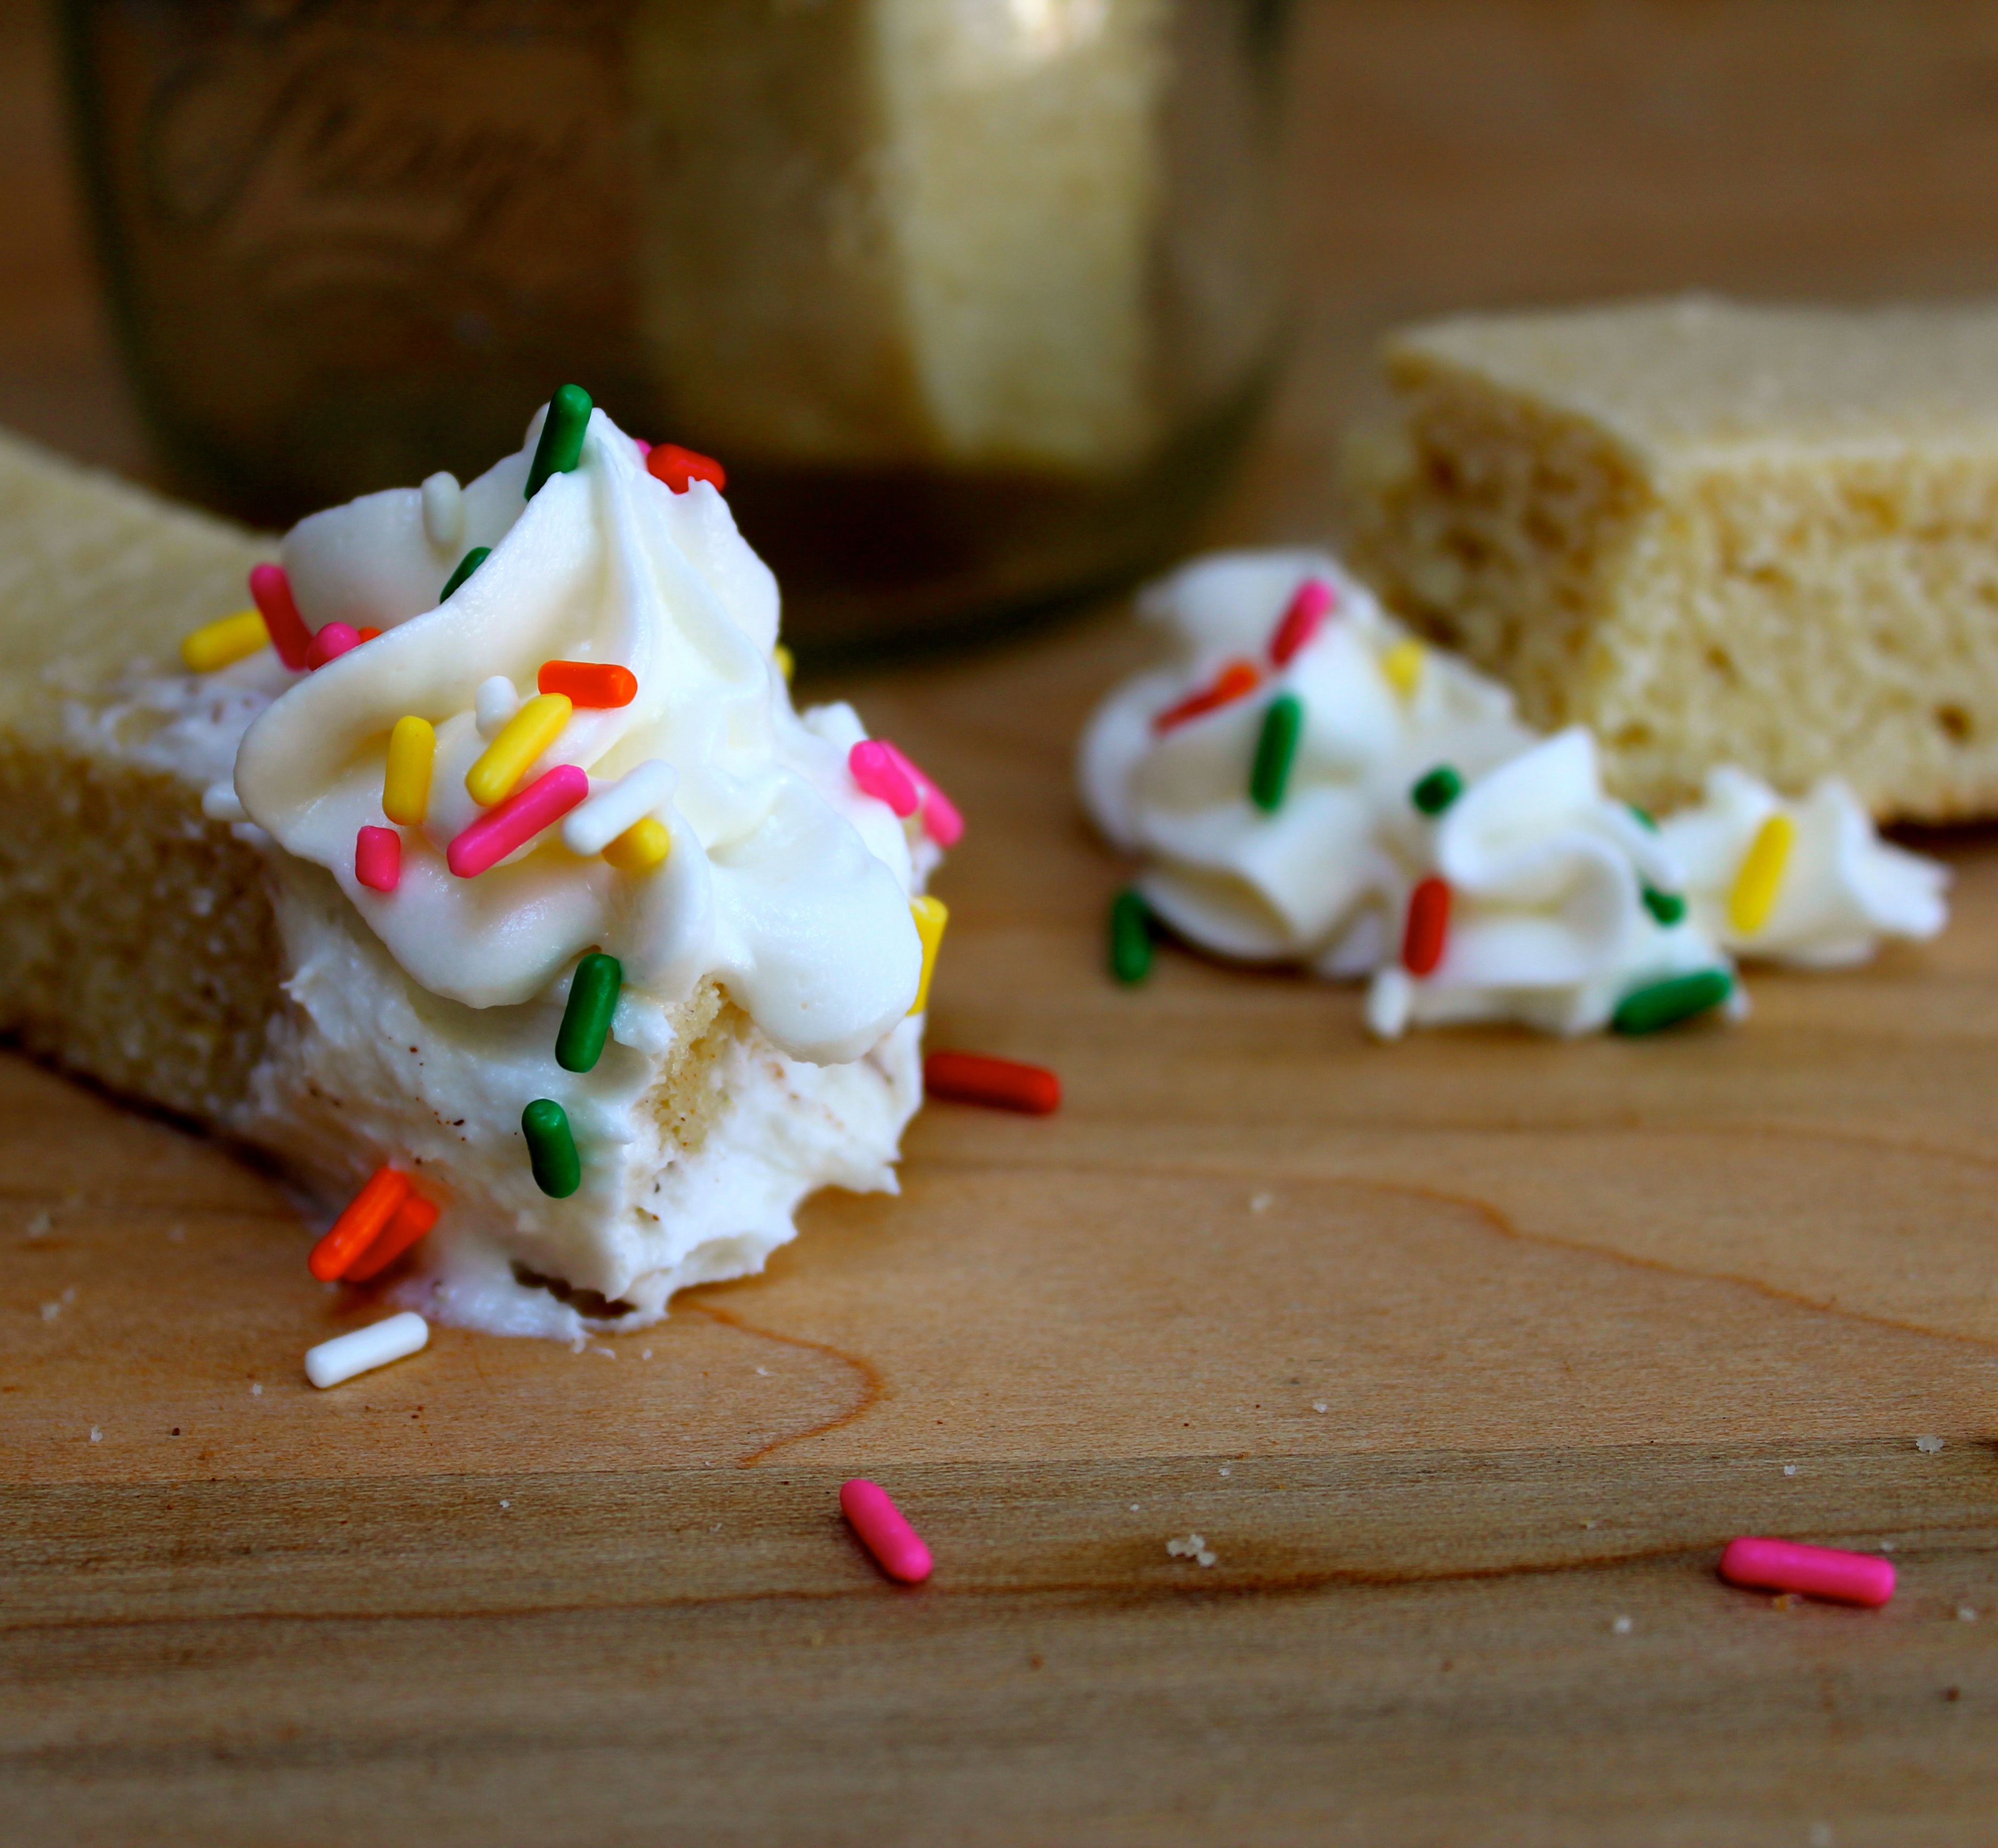
Hence these super yummy, and delightfully pink Carrot Cake Pops! With a whole lot of sprinkles and whole lot of LOVE! So from my heart to yours, here you go…

For the Carrot Cake, you’ll need:

2 cups cake flour

2 cups granulated sugar

1-1/2 teaspoons baking soda

1 tablespoon ground cinnamon

pinch of kosher salt

4 eggs

1-1/3 cup vegetable oil

2 cups grated carrots

1/2 cup chopped pecans

Firstly, preheat your oven to 350d. Lightly butter a square glass baking dish.

On a stand mixer, or by hand held, mix all of the dry ingredients together, until well combined.

Add in each egg, one at a time, until fully mixed with the dry ingredients. Followed with stirring in the vegetable oil until the full mixture becomes thick and creamy.

Now, slowly add in first the carrots, and then the pecans. Stir with a wooden spoon until also fully combined.

Pour the entire cake mixture into the prepared baking dish, smoothing out the top with a rubber spatula.

Pop that cake into the oven and let bake for 25 to 30 minutes. Once the cake is nicely baked through, let the entire dish cool on a wire rack for anywhere from 30 minutes to an hour.

While the cake is cooling, prepare your cream cheese frosting. Need a new homemade cream cheese frosting that you’ll use for just about everything? Here’s my favorite go to:

1/2 cup unsalted butter, softened at room temperature

2 (8oz) packages of cream cheese, softened at room temperature

3 cups powdered sugar

1 teaspoon vanilla extract

2 tablespoons heavy whipping cream

Firstly, combine the butter and cream cheese into the bowl on your stand mixture. Whip up until fully combined.

Add in the 3 cups of powdered sugar, one cup at a time, scraping down the sides and the bottom of the mixing bowl, at the finish of adding in all 3 cups.

Add in the vanilla extract, and then the heavy whipping cream. Whip together, at high speed, for 2 to 3 minutes. Set aside the bowl of frosting.

Now the messy part, which I kinda love! Taking the dish with the fully cooled carrot cake, dig your hands into that perfect cake and crumble all of it up. ALL of it. Anyone else breaking into a happy dance? Ha.

Once that cake is fully crumbled, drop in a cup of the cream cheese frosting onto that crumbled cake. With your hands (again), kneed the frosting into the crumble. The goal is for that cake crumble to become moist enough to roll up into 2 inch cake balls. So you’ll need to continue to add in another cupful or two of frosting to the crumble, until you’re able to roll up 18 to 20 carrot cake balls. Messy, yes, but SO darn FUN!!!

Place each cake ball onto a parchment lined cookie sheet and chill in the fridge for at least one hour.

5 minutes before that hour is up, take a 12oz bag of white or vanilla candy melts and warm up, in 20 seconds intervals, in the microwave, until fully melted and creamy.

Take the fully chilled carrot cake balls out of the fridge and set next to the bowl with the melted candy melts. Prepare to get MESSY (again)! To the point where donning that favorite kitchen apron of yours is recommended. Very recommended.

With a large slotted spoon, dip each cake ball into the melted candy, ensuring that each ball is fully coated before gently depositing each coated cake ball onto the same parchment lined baking sheet that they were chilled on. After each ball is coated, take a lollipop stick and insert into each pop. Followed by sprinkling each cake pop with your favorite colored sugar crystals. In this case, pink. LOTS of pink.

Let your fully decorated cake pops sit at room temperature, until fully hardened. And eat. Or gift to those you love. Since these are LOVE pops!

May your every day, be a day for love. And a day for giving. Especially when giving involves your favorite cake pop.

Happiness Project#70: Blueberry Cream Cheese Frosting!

bbfrosting

Being a Mom, with physical and mental limitations, is rough sometimes. So many of my friends see me as such an easy going, cheerful person, but within myself, I’m much more serious than most know. Particularly when I’m sick. Which seems to be ALL the time. Which isn’t any real surprise. I’ve battled illness since the day I was born, 3 months premature, so I’m not sure why I thought that once I became a Mother, I wouldn’t struggle with constant illness. I must have been a tad delusional.

The hardship with being consistently ill, is that I am NOT a good patient. And can be super hard on myself because of it. More often than not, I rely on my Mom to help me be with my toddler, and it’s still a near daily struggle to be…accepting of this. Accepting that I’m not like the “normal” self sufficient Mother of this generation. That canceling playdates and outings to the playground or bookstore or local zoo, is “my” norm. And that I’m not a failure as a Mom because of it. See? Self-deprecation at it’s worse.

Unfortunately, this past week has been another of my “bad” weeks. And today I wanted to scream out to the Universe how frustrating it is. But I didn’t. And opted instead to pour out these feelings through black words on a keyboard. Because blogging isn’t just about entertainment for me, it’s also about therapy. Therapy through sweet, yummy, drool worthy things. Thanks be for this therapeutic little world of mine. Something that I’ve found that I can always turn to. No matter my good or bad days.

Today’s little bright spot of mine? This lovely, fragrant blueberry cream-cheese frosting! That anyone can whip up and LOVE. Anyone. Trust me.

1 cup fresh blueberries

1/2 cup unsalted butter, softened at room temperature

8oz cream cheese, softened at room temperature

pinch of kosher salt

4 cups sifted powdered sugar

2 to 3 tablespoons heavy whipping cream

Firstly, the blueberries. Rinse and pat dry. Using either a blender or food processor, pulverize the blueberries until smooth and creamy (no lumps). Pour out into a small bowl and set aside.

On a stand (or hand held) mixer, drop the softened butter and cream cheese into the mixing bowl and beat on medium speed, until fully mixed. Drop the mixer down to a slower speed and add in the 4 cups of powdered sugar, one cup at a time. Once fully incorporated, add in the pinch of salt. Bump up the speed to medium and add in the cup of blueberries. Mix until fully incorporated. Lastly, add in up to 3 tablespoons of heavy whipping cream, to create volume.

AND frost! Cookies. Or cupcakes. Or bagels. Or use this fruity frosting as a fruit dip! Because not only does this smell DIVINE but the frosting in and of itself, is kinda (just kinda) pretty too! Right?

Happiness Project#69: Candy Apple Cookie Cups!

skmcacup

IMG_6236 (1)

If you give a Mama a cookie…

It’s been one of my rough weeks. Or to be painfully accurate, a rough month. I re-injured the already deteriorating discs in my neck a few weeks ago, and have been in and out of my (hated) neck brace every day since. If you’ve ever had a severe back or neck injury involving the many discs in your spine, then you presumably know all too well how frustrating wearing a neck brace is. Not only are you virtually immobile with the range of movement in your neck but because of needing to be virtually immobile, you’re generally restricted from doing a whole slew of everyday activity. Like driving. Or being in a car. So thus being said, I’ve been on doctor’s house arrest (for lack of a better word). For nearly FOUR weeks, people. FOUR weeks. No fun.

Fortunately, even though I had to cancel numerous play dates and rely on my husband to run all of our out-of-house errands, my nearly 3 year old daughter didn’t seem to mind. Or notice that we were always inside, with only occasional romps out in the courtyard. Toddlers, my friends. They create play and adventure no matter where the are. Toddlers ROCK!

Anyhow, I’ve been anxiously awaiting the perfect pain-free opportunity to create these super cute cookie cups since well before Christmas. And this weekend was finally my chance. Because if you give a depressed and restless Mama a cookie, she’s going to throw in a whole jumble of yummy, mood altering additions. Like cool whip, caramel sauce, diced Gala apples and mini Snickers candies. Candies. Enough said.

Best of all? This bitesize treat is not only designed for all family members in mind but it’s ridiculously easy to create. Like ridiculous. Ready? GO!

Firstly, you’ll need to create the sugar cookie dough. And since I already have my own sugar cookie recipe that I always use, refer to my Messy Hearts Sugar Cookies post for the easiest cut out cookie recipe you’ll ever need. Or use your own recipe instead. Just note that your sugar cookie dough will need to be a stiffer consistency in order for the cookie cups to set up correctly.

Once you’ve created the dough and rolled it out, on a lightly floured work surface, use a 3 to 4 inch round cookie cutter to create the flat circle needed for the shaped cups.

Set your oven to 350d and lightly spray 1 mini cupcake pan (or 1 standard size cupcake pan) with butter.

Now the messy and FUN part. Take your already cut circles of dough and gently press each disc into each cupcake mold, creating a cup of dough, pressed flat in the middle of the pan, climbing up each side of the mold until the dough is just barely peeking out above the top. Think cup shape.

Slide that pan into the oven and let bake for 12-15 minutes, until the cookie cups are lightly golden in color.

Set out, in the pan, until fully cooled.

Onwards to the cup fillers! You’ll need…

1/2 cup melted and slightly cooled caramel candies

8oz container of Cool Whip

1/2 part Gala Apple, cut into very small, diced pieces

1/2 bag mini Snickers candies (cut in half pieces)

With the tip of a pairing knife, gently loosen each cooled cookie cup from the pan. Place each cup within an assembly line for fillings.

With a tablespoon, dribble the caramel sauce into each cookie cup. Followed with a spoonful of cool whip. Now layer the cool whip section with 3 to 4 diced pieces of apple. Followed with another 2 to 3 spoonfuls of cool whip, filling each cookie cup all the way to (or slightly above) the top edges.

Garnish with mini snickers! Or another apple piece! Because at least the apple part is healthy, right? Ha.

*P.S. Cookie Cups are one of the most versatile desserts you’ll ever run across. Want to use a different candy combination? Try chunks of chocolate chips with mini peanut butter cups! Or how about a healthier option (beyond candy)? Add in a couple tablespoons of your favorite cold yogurt, instead of the cool whip, with a coordinating fruit garnish! The options are endless!

Serve immediately or chill in the fridge until ready for mass family consumption! Just don’t except these lovely little cups to last for much longer than 24 hours. I have a sneaky suspicion that they won’t even last through an hour. Toddlers, remember?

Happiness Project#67: Holiday S’mores Muffins!

IMG_6219

3 months. 3 months later & I’m back! Bananas, right? Not to say that I haven’t wanted to be baking and blogging, because I have! I’ve just had NO time for anything extra in my crazy busy life.

My pastry business is booming, like you wouldn’t believe! I’ve been blessed to have a cake and cupcake order every other weekend now. Which is a whole lot of fun artistry, as well as a wealth of new experience for me.

And just last month, I started up my 2nd business venture as an Usborne Book Consultant. Which is beyond thrilling to my book loving heart! It’s been over 3 years since I left the children’s book industry yet no matter the many years away from it, my first passion will always be and still is that of a children’s bookseller. Needless to say, being able to hand sell wonderful children’s books is like a breath of fresh air. Something that my heart will always take immense delight in.

So in lieu of my beautiful, crazy busy life as a Mom (first) to my amazing (nearly) 3 year old daughter, and a business woman (second), my blog has sadly suffered. Until now!

And since Christmas is just a short 6 days away, I’d like to share my newest holiday muffin with you! Not only because it’s super quick to whip up, but it also features two of the most delicious combined flavors: chocolate and marshmallow. Because let’s get real here, who doesn’t love chocolate and marshmallow? Please don’t delude yourself. It’s not fair to anyone (or any stomach) involved.

Ready for this yummy holiday treat? Let’s do this!

1/2 cup unsalted butter, melted

3/4 cup low fat buttermilk

2 large eggs

1 tablespoon vanilla extract

2 cups all-purpose flour

3/4 cup granulated sugar

2 teaspoons baking powder

pinch of kosher salt

1 tablespoon ground cinnamon

1-1/2 cups chocolate chunks

1 cup mini marshmallows

Preheat your oven to 350 degrees. Break out either a 6 cup jumbo muffin pan or a 12 cup baking pan. Line with paper liners, of whatever festive design you’re itching to throw down.

In a medium sized bowl, beat together the butter, buttermilk, eggs and vanilla extract, for about 1 minute until well incorporated.

In a 2nd bowl, add together the flour, sugar, baking powder, salt and cinnamon. Stir until fully combined.

Transfer the flour mixture into a large bowl, on a stand mixture (or easily by a hand held mixer). With your hands, make a shallow well into the center of the flour mixture. Add the buttermilk mixture into the shallow well and beat gently until smooth.

Now, using a large spatula, gently fold in the chocolate chunks, followed with the mini marshmallows.

Fill up each muffin or cupcake liner 3/4 to the top of each liner. Transfer to the oven and let bake for 19-20 minutes.

Pull out your tray from the oven and let your muffins cool slightly on a wire rack before consuming. Or better yet, gifting to a favorite friend or co-worker. You’ll make their day. Trust me.

To all of you who have been such faithful followers of mine, thank you for making this little blog of mine such a joyful experience! I can’t wait to see what the new brings!


Happiness Project #66: Chocolate Peanut Butter Waffles!

chocpbw

6 weeks. 6 weeks later and this recovery is no fun. This past week has been rough. Emotionally, physically & psychologically. It’s been nearly 3 months since I’ve been able to pick up, run around with or be with my Daughter during the day. And missing my Baby Girl is slowly killing me inside. Which results in anger, frustration and a lakes worth of tears. Tears which could quite possibly reverse the current drought that California is in. Wishful thinking, at least.

So naturally, since chocolate is a girl’s best friend (when the going gets tough), I was determined to create something yummy AND cheer-worthy. All for me today. Forget this menopause weight and always drowning myself in fruits and vegetables. This Mama wanted chocolate and peanut butter. Substitutions not welcome.

Hence this super easy, to DIE for waffle combination. And a little bit of edible happiness on this Tuesday afternoon.

1-1/2 cup all-purpose flour

3-1/2 tablespoons granulated sugar

1/2 cup unsweetened cocoa powder (Ghiradeli, if you want the best)

Pinch of kosher salt

1 teaspoon baking powder

1/2 teaspoon baking soda

3 eggs

4 tablespoons butter, melted

1 teaspoon vanilla extract

2 cups fresh buttermilk

1/2 cup creamy peanut butter

1 cup mini semi-sweet chocolate chips

Break out that favorite waffle maker! Preheat accordingly.

In a medium sized mixing bowl, whisk together the flour, cocoa powder, baking powder, baking soda and salt. Set aside.

In a large bowl, on a stand mixer (or by hand held), combine the eggs, butter, vanilla extract and buttermilk. Stir, on a low setting, until just combined. Slowly add in the peanut butter.

Add in the flour mixture to the peanut butter mixture, mixing well. Sprinkle or stir in the mini chocolate chips.

And onwards to those waffles! Using either a large spoon or a 1/2 measuring cup, scoop in the waffle batter. Bake each batch of waffles until the edges are crispy and the center of each waffle is slightly firm to the touch.

Or just smell your way to the perfect texture! I do.

Once all of those lovely waffles are ready for consumption, pour, sprinkle or frost away! I’m a huge frosting snob & will add frosting to just about everything and anything so these waffles were no exception. And since there’s no such thing as too much peanut butter, well, you get the idea.

If you’d like to add a nice dollop of peanut butter frosting to your mound of waffles, here’s my favorite recipe…

1/2 cup unsalted butter, softened at room temperature

3/4 cup creamy peanut butter

2 cups powdered sugar

1 teaspoon vanilla extract

3 to 4 tablespoons whole milk

In a large bowl on a stand mixer (or by hand held), beat in the softened butter and peanut butter, on medium speed, until fluffy and smooth.

Drop the mixer speed to it’s slowest speed and add in the two cups of powdered sugar. Once well mixed, add in the vanilla extract, followed by up to 4 tablespoons of whole milk. Mix on a high for 3 to 4 minutes.

And FROST! With MORE mini chocolate chips! Because chocolate chips, people.

So now, whenever you too, are having an off kind of day, here’s a little something to perk you up.

Happy Waffling, my friends!

Happy National Ice Cream Day! Summer Ice Cream Round Up: 2015!

“You scream, I scream, we ALL scream for Ice Cream!”

It’s muggy and icky warm today, here in sunny California and ironically, the PERFECT setting to indulge in America’s favorite dessert: ice cream! And since I (unfortunately) won’t be back up and baking up anything new until early September, I’m determined to become the Mistress of Ice Cream. Which will (hopefully) result in epic brownie points from my Daughter and Husband. Which is the BEST reason of all for this massive Summer Round Up of Ice Cream loveliness!

So to kick off my first Round Up Series on the blog, I’m delighted to be sharing a few of the most delightfully, cool-tastic Ice Cream recipes! From blogger friends near and wide! Who know EXACTLY the right way to beat this summer heat!

Who’s ready for Ice Cream?

ice-cream-cake-3

First up in my Summer Ice Cream Round Up, is this GLORIOUS Frozen Banana Split Cake from one of my Mommy blogger friends at Dinner at the Zoo! Even though I’m not personally a huge fan of bananas, here’s what I LOVE about this cake, besides how pretty it is: not only does it incorporate 3 (yes, THREE ice cream flavors) within these 4 perfect layers of banana cake but it also has sprinkles! Sprinkles, my friends! I doubt there’s a soul alive who doesn’t like a good sprinkle garnish! So RUN, yes, RUN to the grocery store to stock up on these 3  ice cream flavors! This cake is all you need for show stopping, ice cream bliss! Thank you, Dinner at the Zoo, for this beautiful, summer masterpiece!

pinwheel-cookie-ice-cream-sandwiches-1

This 2nd featured recipe, Pinwheel Cookie Ice Cream Sandwiches, is by another of my Mommy blogger friends, at Mama Harris’ Kitchen! And oh my sweetness, this ice cream sandwich looks to die for! I love, LOVE ice cream sandwiches (though I’ve never attempted to create one of my own), and could quite possibly indulge in them every single day. Which unfortunately, would not agree with my Menopausal lifestyle right now. Not one bit. However, THIS tantalizing little sandwich has everything I like most about kitchen wizardry: homemade cookies with chocolate AND sprinkles, as well as the most creative ice cream flavor combination from Baskin-Robbins, that I’ve ever heard of. Potato Chips? Pretzels? Caramel? Yes, please! So really, what are you waiting for? There’s no way you can wrong with cookies and ice cream!

ZOURS-homemade-ice-cream-9

Who’s ready for ice cream and CANDY? Yes, I did just say candy! Mama Harris’ Kitchen ALSO has another sweet summer treat, Zours Candy Ice Cream! Incorporating one of my husband’s favorite movie theater indulgences, Mike and Ike’s Candies! Which he buys nearly EVERY time we’re able to spend some quality time at the local theater. And considering how quick and easy this recipe is to create, it’s very likely that this ice cream recipe will undoubtably become my husband’s best friend this summer. So much thanks, Mama Harris, for this perfect family treat!

ThinMintCookieCoffeeDFIceCreamleft

Now THIS Thin Mint Cookie and Coffee Dairy-Free Ice Cream from Urban Bliss Life, is ALL for me! Must I even explain why?? Coffee, my friends. Coffee. With cookies. The perfect companion to my semi-regualr book reading Sunday afternoons. Hot coffee is not always a good idea for warm summer days with a side of hot flashes. A favorite morning obsession of mine that is generally frowned upon in my family (out of love, though, rather than criticism). So this homemade coffee ice cream should be very happily received from now on. Sundays or not. Thank you, Urban Bliss Life, for this delicious ice cream recipe! You’ve officially saved my Sundays!

Breakfast Popsicles

Last up in my Summer Ice Cream Round up? These delectable looking Breakfast Popsicles from Working Mom Magic! Being a working mom myself (with two of my own weekend businesses), I truly appreciate fast, easy breakfast ideas for my 2-1/2 year old Daughter. And this Breakfast Popscicle, with all of it’s Honey Bunches of Oats cereal, fresh fruit, and yogurt GOODNESS, is right up my alley! Because what busy Mom (working or not) doesn’t want something healthy AND yummy for their ever blossoming kiddos? I, for one, cannot wait to try my hand at this kid-tastic recipe! Tonight, perhaps! From the kitchen of this Mama to yours, many thanks to Working Mom Magic, for this much needed post!

See anything from these featured recipe posts that you like? Which one will you be whipping up tonight?

Happy National Ice Cream Day, my friends! Hope you’re keeping it cool!

Happiness Project Recipe #65: Rainbow Cheerio Yogurt Pops!

rainbowy1

rainbowy2

Heat. This Menopausal Mama does not LIKE heat. Alright, never mind. Like is too soft a word for my…distain of this (horrid) 90ish degree weather. Now HATE? HATE is much more accurate. So let’s start over.

Heat. This Menopausal Mama HATES heat. Because in my life, with hot flashes and mood swings and weird (sad) skin, 90 degrees is actually much more like 100 degrees to me. Which is NO fun. NO. FUN. So you know what I do when I’m THIS grumpy and uncomfortable? I bake yummy things. Usually. Until now, when the physical aspect of baking doesn’t comply with my doctor’s (very strict) orders.

Hence, new popsicles. All of which throw together 3 of my family’s favorite flavors: peach (for my Daughter), strawberry (for me) and vanilla (for my Husband). Oh, and cheerios. The staple of any family with toddlers pantry. At least now, since my Toddler is nearly 2 and a half years old, these cheerios are actually ON the popsicles instead of the floor. Or the couch. Or the dog’s head.

And here’s the thing that I love about this recipe. Not only is this recipe so simple in ingredients and so easy in preparation that anyone can create them (kids too!) but I’m able to use the only yogurt that my stomach can handle correctly: Activia. Hallelujah! So if you too have a sensitive stomach with yogurts or milk, try Activia. It may change the entire way you see breakfast. Or dessert, perhaps.

Ready for this wonderful Summer-lovin recipe? Here’s all you need…

(1) 4 cavity popsicle mold (in whatever shape you like)

6 cartons of your favorite Activia brand yogurt. 2 peach, 2 strawberry & 2 vanilla for this specific rainbow recipe.

4 wooden popsicle sticks

1/2 cup whole grain cheerios

Firstly, organize all of the ingredients on your work surface. Yogurt, popsicle mold, wooden sticks and then cheerios.

In each cavity of the popsicle mold, spoon in 1-1/2 to 2 tablespoons of the strawberry yogurt. Shake gently to smooth the surface. Place the mold in the back of the freezer for 10 minutes to harden up slightly.

Continue this exact process with each of the remaining two yogurt flavors, remembering to freeze each layer in-between each addition.

Once the 3rd yogurt layer has been chilling in the freezer for that last 10 minutes, remove and gently press in each of the popsicle sticks, until there’s a least 2 inches worth of stick visible above the surface, to use as the handle. Now, gently push in as many cheerios as will fit around each handle. Freeze for a good 30 minutes to an hour so that the entire popsicle is fully frozen.

And eat. Or nibble on. Or let your kiddo run around outside with it, waving it gleefully in the air. Until you’re hands are sticky and your toddler is grinning from ear to ear!

Let’s beat this heat! One rainbow popsicle at a time!

Happiness Project Recipe #63: Fathers Day Fun Bowls!

fdwc1

fdwc2

Fathers Day Year 3! Fathers Day this year within my little Family of 3 wasn’t quite what I had hoped it to be. I had PLANS for the Father of my beautiful Little Girl. But we all know that life sometimes happens when you’re out making plans. With no exception this year. That grandeos plan of creating this lovely toddler painted hand print, decked out in a cute homemade photo frame? Nope. Instead of cute toddler prints with glitter and glue, the middle of this week consisted of emergency back surgery (for me). Which meant rest. And very little (nearly non-exsistent) physical activity. Which meant NO kitchen time. None. Imagine, just imagine, how depressing this is. Could you keep yourself away from your own kitchen for 6 to 8 weeks?? Yes, 6 to EIGHT weeks. See? Depressing. So needless to say, nothing that I had wanted to create for my beloved Husband happened.

HOWEVER. You want to know what DID transpire instead? A dessert recipe incorporating two of my Husband’s favorite things: vanilla ice cream and waffles! A chocolate dipped waffle bowl that required NO oven time! Which, in turn, required very little physical activity on my part. Doctor approved. And since no Fathers Day treat would be complete without something special just for his Little Girl as well, I threw (literally threw) in a whole lot of rainbow sprinkles. Which (naturally) ended up everywhere but on the actual waffle bowl. Chloe Girl approved.

So who’s ready for one of the simplest and cheeriest of no-bake desserts? Husband approved.

4 Waffle Bowls

1 8oz bag of chocolate candy melts

1 carton vanilla bean ice cream (homemade or store bought)

1 large banana, sliced up into equal parts

8 to 12 fresh strawberries, rinsed and pat dried

1/2 cup fresh blueberries, rinsed and pat dried

*Rainbow sprinkles, optional

*If you’re eagerly wanting to whip up some home-made ice cream beforehand, here’s one of my favorite (& easiest) go to vanilla ice cream recipes.

Firstly, line up all of your ingredients for easy assembly. 4 waffle bowls, 1 bowl of strawberries, 1 bowl of cut bananas, 1 bowl of blueberries.

In a large bowl, heat up the candy melts, stirring in 20 second intervals until completely melted and smooth. Remove from the microwave.

Place the 4 waffle bowls on parchment paper and then, one at a time, dip the bottom half of each bowl into the bowl of melted chocolate. Deposit each bowl, upside down, onto the parchment paper to dry.

*If you want to add sprinkles to the waffle bowls, hold each bowl up by the rim, one at a time, and sprinkle on however many jimmies you want, until the chocolate is fully covered.

Next up? The strawberries! While pinching the head of each strawberry, dip each tip into the chocolate, one at a time. Let each strawberry sit on it’s side to dry.

Once the chocolate on each waffle bowl has hardened up and dried, grab up that yummy carton of vanilla ice cream and load those bowls up!

Followed with a generous heaping of those chocolate dipped strawberries, banana slices and juicy blueberries.

And maybe, just maybe, another pinch of sprinkles. More so for that eagerly awaiting toddler, than anyone else.

From my kitchen to yours, I hope you all celebrated a lovely Fathers Day! xoxo

Happiness Project Recipe #60: Anniversary Cookie Bars & Snickerdoodle Frosting Dip!

snickerc1

snickerc2

10 years. May 15th was an incredibly special day for my Husband & I. Because May 15th represented an entire 10 years of being together. An entire decade. Of facing more challenges than many would face in their entire lifetime, more or less 10 years. A story most of you know very well. Because being expressive about all the ups, downs and most beautiful things and people in my life thus far, is who I am. Most especially in regards to my Husband. Who I knew I was meant to spend the rest of my life with, 10 years ago, on our 3rd date, on a darkened beach in Santa Cruz. 10 years of happiness, joy, tears, & pain, but most importantly, love. Real love. Grown up, every day, loving-this-one-person-through-everything-kind-of Love. A Love that has journeyed through fire & back yet come out better and brighter, in the best of ways. This Love between this one man and I. A Love like no other. Real Love.

So to honor this most beautiful day, I gave this Man of mine another little a piece of my Heart. Through a whisk and a spoon. A little bit of cinnamon and a whole lot of sugar. Because this is one of the most significant ways that I give to those I hold so dearly within my Heart. This gift of myself through my kitchen.

Hence his favorite dessert flavor of all time. Snickerdoodles. With a side of cookies. In the yummiest form ever: cookie bars! Which are perfect, seriously perfect, for dunking.

From my Heart to your Kitchen, may you enjoy this special treat just as much as my Husband does.

Cookies:

1 cup salted butter

1-1/2 cup granulated sugar

2 eggs

1 teaspoon vanilla extract

4 cups all-purpose flour

3 teaspoons baking powder

pinch of kosher salt

1/2 cup heavy cream

Preheat your oven to 350F and lightly spray one 8×10 inch glass baking dish. Line the sprayed dish with parchment paper, leaving just enough excess on each side to create an overhang.

In a stand mixture, cream the butter, sugar and eggs at medium speed for 2-3 minutes until light and fluffy. Add in each egg, one at a time, until well mixed. Sift in the flour, baking powder and salt, adding the heavy cream as needed, until throughly combined. This dough should be a stiff not soft texture. If it’s too soft to handle, cover and let chill in the fridge for 30 minutes to an hour.

Break out that pastry board (marble is always preferred over wooden) and rolling pin. Quick tip, one of the most valuable things I learned while in Pastry School is that rolling pins are NOT all created equal. The most efficient rolling pin for cookie dough? The classic wooden pin with no handles.

Once the cookie dough is stiff enough to roll into a large ball, lightly flour your pastry board AND rolling pin (so that the dough doesn’t stick to either surface while being rolled out). Roll out the dough to about 1 inch thick. Now gently and loosely transfer the rolled out dough into the prepared baking dish. Once transferred, using another piece of parchment paper, gently but firmly press the dough into the full baking dish.

Bake for 15-18 minutes, until the pan cookie is firm to the touch and slightly browned on the very edges of the dish. Let cool in the dish for 10-15 minutes. Now before you go on removing the giant cookie with the overhang of parchment paper, use a small pairing knife to cut that giant cookie into cookie strips (or bars). Then remove the entire cookie from the dish with the parchment paper. Set aside to cool throughly.

Next up: the Frosting Dip!

1 cup unsalted butter, softened at room temperature

3 cups powdered sugar

pinch of kosher salt

1 teaspoon clear vanilla extract

2 to 3 tablespoons heavy whipping cream

1/2 tablespoon fresh ground cinnamon

On your stand mixer, cream the butter until light and fluffy.

Drop the mixer speed down to low and gradually add in the 3 cups of powdered sugar. Mix until fully incorporated.

Switch your mixture speed back up to a higher setting and add in the kosher salt, followed by the heavy whipping cream. Whip for 3-4 minutes until the frosting has nearly doubled in size.

Lastly, but most importantly, add in that ground cinnamon. Which kinda MAKES this frosting, in my Husband’s opinion.

AND spread onto those cooled cookie bars! Or use as a cookie dip. Which is even more FUN!

Happiness Project Recipe #59: Strawberry-Lemonade Toddler Ice Pops!

strawberrypop2

strawberryp1

Oh my sweetness, my friends! Spring is officially upon us! Ehr…those of us in California, that is. Which means warmer weather. For better or for worse, depending on if you actually like warmer weather. And strawberries. Beautiful, lush, ripe strawberries. Ultimate Mommy happiness. And did I forget to mention prime Popsicle-making season? It tis! Especially for Toddlers. Okay, and maybe for those of us adults who are also kids-at-heart, too. I promise I won’t tell any of the “other” adults.

Anyhow, back to this glorious, long anticipated Popsicle-making season. I’ve been wanting to create my own Daughter appeasing fruit popsicles for a few months now. But had to wait for the perfect strawberries. And well, here they are! Strawberry-Lemonade Ice Pops! With the lovely tang of sweet lemonade and juicy bits of chilled strawberries. The best of everything a picky Toddler and busy Mom could ever want.

Point in case? Even though it only took me maybe 45 minutes (from start to finish) for these pops to become the perfect frozen consistency, my Daughter consumed 3 of these in less than 10 minutes. I kid you not. Less than TEN minutes. And then ran back up to the fridge, while enthusiastically hopping up and down, saying, “More!” Yes, I did said, “No.” 3 of these is quite enough for one mere Toddler sitting. I swear I’m not a mean Mom. I swear!

Ready for a taste? Here ya go!

3-4 cups fresh lemonade

1 cup sliced or diced fresh strawberries, washed before hand

12 baking cups with a wax interior molding (the easiest baking cups to unmold once frozen)

12 wooden popsicle sticks

Arrange up to 12 baking cups onto a small baking sheet. In each cup, pour in enough lemonade to fill the cup all the way up to the top edge. Place the lemonade filled cups into the freezer for about 20-25 minutes.

While the lemonade cups are firming up, wash, slice & dice the strawberries until you have 2 to 3 strawberry pieces per lemonade cup.

Before adding in the strawberry pieces, check that the lemonade cups have firmed up enough to be slightly harder than a slushy (consistency). Gently push 2 to 3 strawberry pieces into each cup before placing the pops back into the freezer. Again with the freezer, I know.

Once the pops have been in the freezer for another 10 minutes, remove them from the freezer and push in each popsicle stick, into the direct center of each cup, from top to bottom. Freeze again until fully frozen.

Once you’re ready to serve them up to all of those hungry Toddler tummies, simply peel away each baking cup and hand em over.

So. Ridiculously. Easy.

Just promise me that you’ll save at least 1 for yourself, okay?

Happy Spring, my friends!