Happiness Project #84: Chocolate Peanut Butter Milkshake!

pbcshake1

pbcshake2

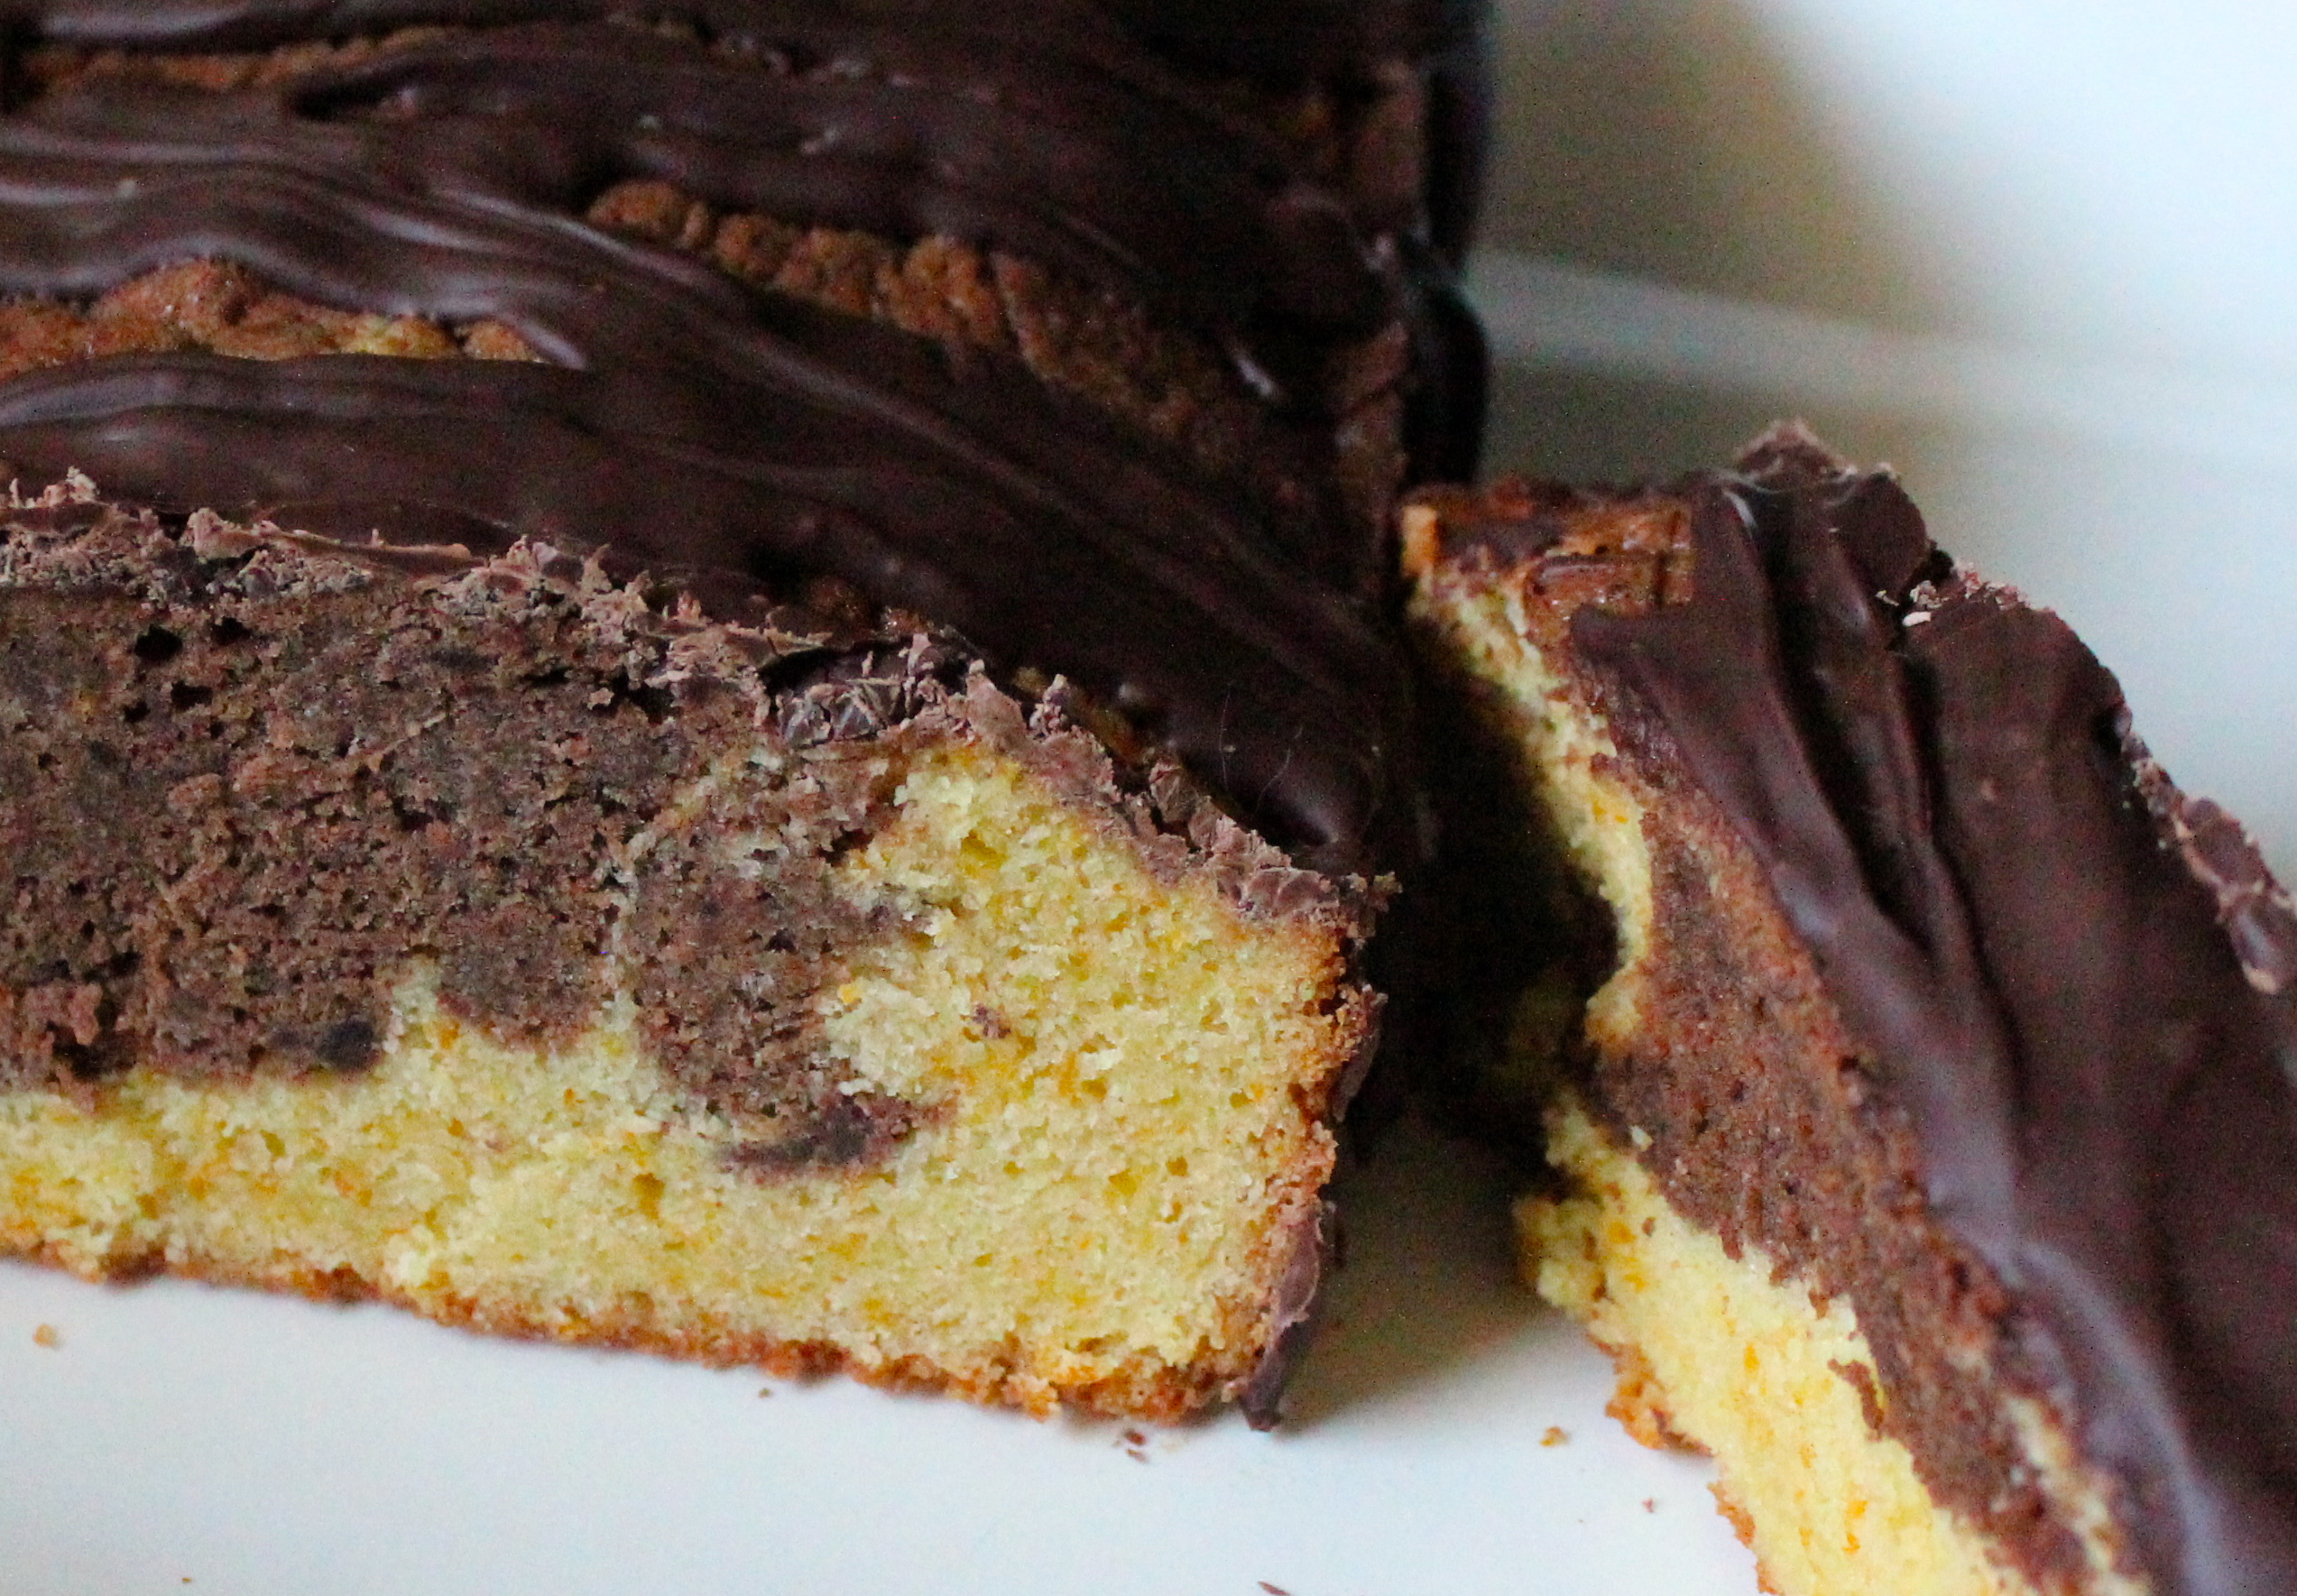
It’s been 3 months since starting chemotherapy, and it’s been, without a doubt, the most difficult experience I’ve ever faced. I’m rarely feeling well enough to make it outside more or less whip up new blog posts. And I miss my life before cancer, in every way imaginable.

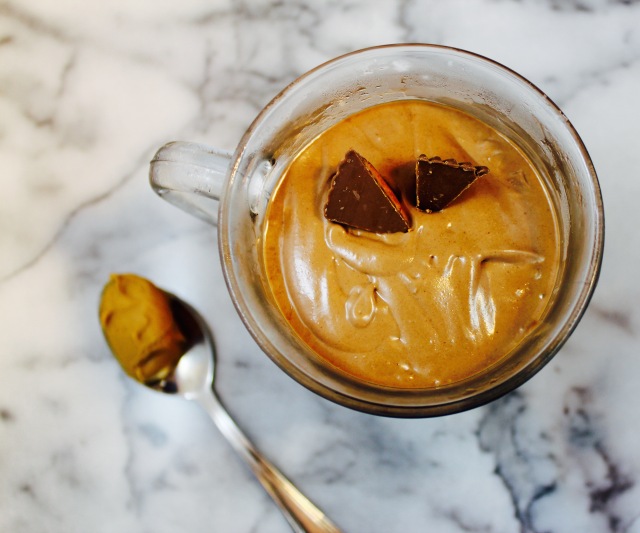
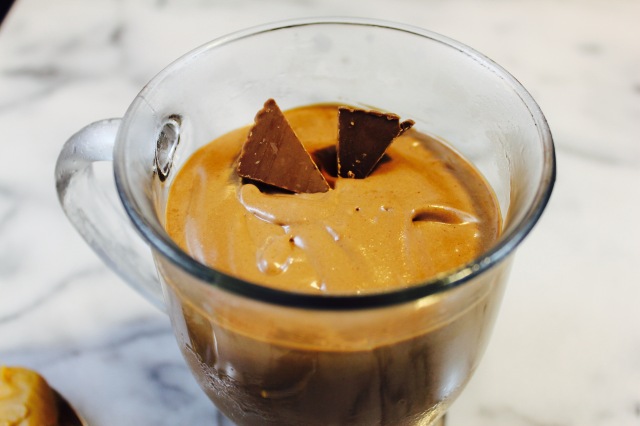
However, despite now normal neuropathy of my legs yesterday (where it’s painful to walk or stand), I was determined to share my newest, highly decadent milkshake, made with two of my favorite flavor combinations (a favorite combination to most everyone else, too): peanut butter and chocolate! Because you can’t go wrong with peanut butter and chocolate, right? Especially with a recipe THIS easy!

Here’s all you’ll need:

3 scoops natural chocolate ice cream (whatever your favorite brand)

3/4 cup creamy peanut butter

1-1/2 cups whole milk

*cut up pieces of recesses peanut butter cups for garnish, optional

In a blender, combine all three ingredients and pulse a few minutes until fully combined and smooth. Depending on the size of your serving glasses, you’ll be able to serve 2 to 4 cupfuls.

This is a very thick milkshake so you’ll easily be able to use a spoon while indulging in it.

And can add or stir in cut up pieces of recesses peanut butter cups or mini milk chocolate chocolate chips as an additional garnish, too. Though not necessary. Trust me.


Happiness Project #66: Chocolate Peanut Butter Waffles!

chocpbw

6 weeks. 6 weeks later and this recovery is no fun. This past week has been rough. Emotionally, physically & psychologically. It’s been nearly 3 months since I’ve been able to pick up, run around with or be with my Daughter during the day. And missing my Baby Girl is slowly killing me inside. Which results in anger, frustration and a lakes worth of tears. Tears which could quite possibly reverse the current drought that California is in. Wishful thinking, at least.

So naturally, since chocolate is a girl’s best friend (when the going gets tough), I was determined to create something yummy AND cheer-worthy. All for me today. Forget this menopause weight and always drowning myself in fruits and vegetables. This Mama wanted chocolate and peanut butter. Substitutions not welcome.

Hence this super easy, to DIE for waffle combination. And a little bit of edible happiness on this Tuesday afternoon.

1-1/2 cup all-purpose flour

3-1/2 tablespoons granulated sugar

1/2 cup unsweetened cocoa powder (Ghiradeli, if you want the best)

Pinch of kosher salt

1 teaspoon baking powder

1/2 teaspoon baking soda

3 eggs

4 tablespoons butter, melted

1 teaspoon vanilla extract

2 cups fresh buttermilk

1/2 cup creamy peanut butter

1 cup mini semi-sweet chocolate chips

Break out that favorite waffle maker! Preheat accordingly.

In a medium sized mixing bowl, whisk together the flour, cocoa powder, baking powder, baking soda and salt. Set aside.

In a large bowl, on a stand mixer (or by hand held), combine the eggs, butter, vanilla extract and buttermilk. Stir, on a low setting, until just combined. Slowly add in the peanut butter.

Add in the flour mixture to the peanut butter mixture, mixing well. Sprinkle or stir in the mini chocolate chips.

And onwards to those waffles! Using either a large spoon or a 1/2 measuring cup, scoop in the waffle batter. Bake each batch of waffles until the edges are crispy and the center of each waffle is slightly firm to the touch.

Or just smell your way to the perfect texture! I do.

Once all of those lovely waffles are ready for consumption, pour, sprinkle or frost away! I’m a huge frosting snob & will add frosting to just about everything and anything so these waffles were no exception. And since there’s no such thing as too much peanut butter, well, you get the idea.

If you’d like to add a nice dollop of peanut butter frosting to your mound of waffles, here’s my favorite recipe…

1/2 cup unsalted butter, softened at room temperature

3/4 cup creamy peanut butter

2 cups powdered sugar

1 teaspoon vanilla extract

3 to 4 tablespoons whole milk

In a large bowl on a stand mixer (or by hand held), beat in the softened butter and peanut butter, on medium speed, until fluffy and smooth.

Drop the mixer speed to it’s slowest speed and add in the two cups of powdered sugar. Once well mixed, add in the vanilla extract, followed by up to 4 tablespoons of whole milk. Mix on a high for 3 to 4 minutes.

And FROST! With MORE mini chocolate chips! Because chocolate chips, people.

So now, whenever you too, are having an off kind of day, here’s a little something to perk you up.

Happy Waffling, my friends!

Happiness Project #32: Chocolate Orange Pound Cake!

Image

Mmmmmm! Orange and chocolate. Since nearly every HP dessert I’ve done since first creating this blog nearly 2 years ago has mostly involved chocolate, I thought it was high time to throw some citrus into the mix. And since I’ve never experimented with oranges before (for shame, right?), I ended up whipping up a very traditional Chocolate Orange Pound Cake recipe. Traditional because I did absolutely nothing to change the actual recipe, though I might add some chocolate chips into the mix the next around. And WOW, was this one of this easiest yet quickest cakes I’ve ever done! One, which not only smelled DIVINE while puffing up in my oven but tasted even better the second day out! Need to whip up something yummy that everyone will like but don’t have much time to do so? Then this, my friends, is the perfect cake for you!

1 cup salted butter, softened at room temperature

1 cup granulated sugar

4 eggs

1 cup all-purpose flour

2 tablespoons whole milk

3 tablespoons unsweetened cocoa powder

The zest from 1 large orange

1/2 cup semi-sweet chocolate chips, melted (for drizzle)

Preheat your oven to 350F. Butter and lightly flour 1 small loaf pan. Or butter up a muffin pan for yummy, breakfast treats instead! Have kids, anyone?

In a bowl on your stand mixer, cream together the butter and granulated sugar until smooth and creamy. Add in the eggs, one at a time, until well mixed, followed by slowly sifting in the all-purpose flour.

Once blended, divide the mixture equally between two small bowls. In one bowl, add in the milk & cocoa powder and combine together. In the second bowl, beat in the orange zest until well mixed.

Spoon the mixture into the loaf pan, taking large alternate spoonfuls from each bowl. Using a fork, gently swirl the mixture together to create a marbled effect. Do not STIR the two batters together though or they will blend and you will lose the marbled effect.

Bake for up to 45 minutes until golden brown on the edges and top. With a toothpick, check to make sure that the cake is fully baked through in the center.

Let cool on a wire rack for a good 30 minutes before loosening the cakes edges with the flat side of a butter knife and removing from the pan.

To add the chocolate drizzle, heat up the 1/2 cup of chocolate chips in the microwave (20-30 seconds) until melted and smooth. Drizzle as much as preferred onto the top half of the cake. Or instead of drizzling melted chocolate, how about sifting powdered sugar on top, particularly if you (or you kids) are hankering for some breakfast muffins? Your kids will love you even more (because what child doesn’t love powdered sugar?) and most assuredly, ask for seconds =)

*Original recipe: BBC Chocolate Orange Loaf

Happiness Project #30: S’mores Cookie Sliders!

IMG_5772In two short days, my baby girl will be 9 months old! And although I’m fiercely excited about all of her developments (just yesterday, she tried repeatedly to pull herself over her baby gate! On top of the fact that she’s now standing, waving, high five-ing everyone she sees and has FOUR teeth already!), it’s still very bittersweet to me as well. At nearly nine months already, her babyhood is fast coming to an end, and because she is my only child (unless we’re able to adopt one day), I can’t help but want to slow it all down. Wishful thinking, I know, but prevalent, none-the-less. *sigh* Oh, the beautiful, happy joys of babyhood! What a wonderous thing to witness!

Mommyhood aside, a couple of months back, one of my cousins pinned a drool-worthy S’mores dessert on Pinterest (Oh, Pinterest!) and ever since then, I’ve been dying to create my own modernized party version of it! Hence these perfectly messy cookie sliders! The best part about this new recipe though, besides it’s triple chocolate yumminess? It’s quite easy to assemble as well as very family friendly! AND there’s NO baking required! You just have to be rather quick at multitasking! Seriously quick! Or else and better yet, this is one of those rare assembly recipes that the whole family can help out with! So grab a family member or two, throw on some holiday music and get messy with this delicious S’mores treat! Ready?

First up: the cookie dough truffles! You’ll need…

1-1/2 cups all-purpose flour

1/2 cup unsweetened cocoa powder

3/4 teaspoon baking soda

1/2 teaspoon salt

1/2 cup unsalted butter, softened at room temperature

1-1/2 cups granulated sugar

1/2 cup creamy peanut butter

2 large eggs

1 teaspoon vanilla extract

12 oz bag of chocolate candy melts

In a small bowl, mix the flour, cocoa powder, baking soda and salt with a wire whisk and set aside. In a 2nd bowl, on a stand mixer (or by hand), cream the butter, granulated sugar and peanut butter for 2-3 minutes until well mixed. Add the eggs and vanilla and mix until also well combined. Now add the flour mixture, in the 1st bowl, to the wet mixture and mix gently, at your mixers lowest speed, until throughly mixed. At this point, the dough might be a bit too wet to handle so pop the bowl in the fridge until the dough is stiff enough to roll easily. By hand, roll up the dough into 1-1/2 inch balls. I always recommend rolling your dough by hand verses by a cookie scoop because with the hand rolling technique, it’s easier to create a firmer, more perfectly circular ball. Try it out to see (and feel) the difference! 🙂 *This cookie recipe will make up to 20 dough balls.*

Next, line a baking sheet with either a Silpat mat or parchment paper and fill up the entire baking sheet with evenly spaced chocolate dough balls. Place the baking sheet with the chocolate dough balls in the freezer for 20-30 minutes to chill.

While your dough balls are chilling, this is the perfect time to set up your graham cracker/marshmallow assembly station. You’ll need…

1 box of Graham Crackers *gently cut or break each full sized graham cracker in half. *You will need up to 20 graham cracker halves.*

1 bag of large marshmallows

On a large microwavable plate, place 1 marshmallow on top of each halved graham cracker. Set them all aside.

2-3 minutes before you’re ready to take the chilled chocolate dough balls out of the  freezer, empty the entire 12 oz package of chocolate candy melts into a medium sized microwavable bowl. Heat up the candy melts, in three to four 20 second intervals until the chocolate candy is completely melted and smooth. Set aside.

Ready to take out those chilled cookie balls? Please do! Before you start dipping away though, you’ll need to soften the marshmallows you’ve assembled on their graham crackers. Softening them will create the cushion (or slight indentation) that the dipped cookie balls will sit on.

Depending on the strength of your microwave, warm up each marshmallow until they are ever so slightly softened (my microwave was set at 14 seconds). Just enough so that you can gently press your finger down into the center of each marshmallow to create a slight cushion (or indentation).

Now, the messy part! With a large slotted spoon, dip a cookie ball into the melted chocolate until the ball is throughly coated. *Oh, and just in case I didn’t mention it before, you might want to wear an apron for this! This can get very messy!* With the tip of the spoon, gently tap off the excess dipping chocolate (if you want a smoother cookie texture). Gently and carefully, transfer the coated cookie onto the cushioned marshmallow. Repeat for the rest of the cookie dough balls. Once all of your S’mores Cookie Sliders are fully assembled, stick them, covered, in the fridge until serving.

See? What did I tell you? Fun AND easy! A perfect treat for all of those holiday family gatherings! So get to it and get messy! Nom! Nom!

Happiness Project Recipe #20: Southern Mama Chocolate Coca-Cola Cake!

Image

Coca-Cola in cake?? Yes, please! Why though have I never before indulged in this sweetened, chocolaty delight?? Perhaps, because before now, I had never heard of such a lovely cake! So for the 1st time since recovering from my surgery (and after being horribly sick for the past 2 & a half weeks), I finally felt well enough to be up and about in my kitchen, trying out this new recipe. Oh kitchen, how dearly I’ve missed thee! Regardless of the fact that I generally stay as far away from soda as I can (considering how truly disgusting and tragically unhealthy the drink itself is), I was very intrigued by the idea of combining coke with chocolate and was not disappointed with the end result. So here it is, my soda loving friends! Come and get your fix on!

2 cups all-purpose flour

1 teaspoon baking soda

1 1/2 cups sugar

1 cup (2 sticks) salted butter

1 1/2 cups mini marshmallows

1/2 cup semi-sweet chocolate chips

1/4 cup cocoa (I swear by the Ghirardelli brand)

1 cup Coca-Cola

1/2 cup buttermilk

2 eggs

2 teaspoons vanilla

Icing

1/2 cup salted butter

1/3 cup Coca-Cola

3 tablespoons cocoa

3 1/2 cups powdered sugar

1 tablespoon vanilla

*1/2 cup finely chopped pecans (optional) or 1 scoop of vanilla ice cream per serving

Preheat your oven to 350F

In bowl #1, combine the flour, baking soda and sugar. Blend well. In a medium saucepan, throw in the butter, marshmallows and chocolate chips. Cook over medium heat until everything is nicely melted and bubbling slightly in the pan. Remove from the heat and stir in the cocoa. Set aside and let cool slightly. Now add the Coca-Cola, buttermilk, eggs and vanilla to the dry ingredients (bowl #1), stir until just combined. Slowly add the slightly cooled butter/marshmallow/chocolate chip/cocoa mixture and mix until combined.

Pour the batter into a greased or sprayed 9X13 pan and bake for 30-35 minutes until a toothpick inserted in the cakes center comes out clean. Set your cake aside to cool slightly while you’re preparing the icing.

For the icing, combine the butter, Coca-Cola, cocoa and powdered sugar in another saucepan, heating on high until just boiling. Remove from the heat and stir in the vanilla. Now comes the very important part. Quickly and evenly pour the hot icing over your slightly cooled cake. The faster you pour the hot icing over the cake, the less likely it will start hardening up (a lesson I learned the hard way today). Now, if desired, sprinkle with pecans. Although this cake is best when served warm, it will still taste quite flavorful when fully cooled as well.

*Don’t want to use a pecan topping? How about a scoop of lovely vanilla ice cream on each serving instead!*

So go grab that pack of tempting, unused soda and do something creative with it! Tis a very yummy, sweet and fun cake, if I say so!

Happiness Project Recipe #12: Chocolate PB Pretzel Niblets!

Image

Oh Chocolate! Glorious, glorious chocolate! In addition to random, early morning cravings for oyster crackers & sour patch kids, the thought of chocolate alone sometimes gets me through the worst of pain. Unless, of course that thought becomes a horrible, uncontrollable longing at 1am that MUST be fed (imagine dragging yourself out of bed in the middle of the night to spend some quality time with your kitchen)! So in the interest of self preservation, I made that terrible longing for chocolaty, crunchy sweetness a long awaited reality! Hence the birth of my FAVORITE Happiness Project recipe thus far: the Chocolate PB Pretzel Niblet! Yes, this unassuming bite-size morsel has now become one of my all time FAVORITE dessert recipes (and that’s saying something considering the uncountable number of recipes I’ve been tinkering with these past few months)! I quite literally inhaled THREE of them, back to back yesterday, without batting an eye! That’s madness, my friends! Madness! So with no further adieu, here’s the recipe…

1 1/8 cups creamy peanut butter

10 tablespoons confections sugar

2 tablespoons unsalted butter, room temperature

2 cups finely crushed Pretzels

10 ounces milk or dark chocolate candy melts

Break out that apron again! You’re going to need it for this one!

In a medium sized mixing bowl (with a paddle attachment if on a stand mixer), stir together the peanut butter, confections sugar, butter & crushed pretzels until well combined. You can easily do this by hand with a wooden spoon if you don’t have a stand mixer.

Quick tip: Place your pretzels in a closed ziplock bag while crushing them up. Clean up is easier this way. Plus, your kitchen will thank you.

Roll or firmly pinch your mixture into 1 inch balls & arrange them on a parchment or Silpat lined baking sheet. This should make you about 24 pretzel balls. Freeze them for 30-40 minutes until firm.

Before you take your semi-frozen pretzel balls out of the freezer, melt your chocolate candy in a microwave safe bowl on high for about 1 minute, stirring at each 30 second interval. Using a large fork or spoon, dip each ball into your bowl of melted chocolate, gently tapping the fork or spoon on the bowls rim to remove excess chocolate. Deposit your covered balls onto your lined baking sheet & chill in the fridge until the candy coating is set before serving. If not serving immediately, keep them in an airtight container for up to 3 days.

Easy, right? Right!

Happy 4th of July, my friends! And happy nibbling!

Happiness Project Recipe #10: White & Dark Chocolate Cake Brownies!

Oh. My. Word. You don’t know the meaning of true decadence unless you’ve tried this oozing concoction of cake brownie heaven! Considering how much of a chocolate connoisseur I am, I’ve rarely come across a dessert that is simply TOO much for me to handle. Until now.

This recipe nearly sugar-shocked me into complete chocolate withdrawal. That’s how good it is! Plus, once the flavors have settled in a bit, it tastes even BETTER the day after (I think so, at least). So here it is, in all of it’s sticky, gooey greatness!

1 box devil’s food chocolate cake mix

½ cup butter, softened at room temperature

1 large egg

1 teaspoon vanilla extract

2 to 3 tablespoons cold brewed coffee

1 cup semi-sweet chocolate chips

1 cup white chocolate chips

1 can (14-ounces) sweetened condensed milk

½ cup (4 ounces) cream cheese, softened

½ teaspoon clear vanilla extract

Preheat your oven to 350F and prepare a 9×9 pan by lining it with aluminum foil and then spraying it with cooking spray. In a large mixing bowl, combine the cake mix, butter, egg & vanilla and mix with electric beaters. The batter will be very thick & difficult to combine at first, so adding the coffee will help create a softer consistency. Start pressing the dough into the prepared pan & prepare yourself for incredibly messy fingers. Even though it will be a bit sticky, keep pressing & spreading it until it’s evenly laid out.  Once you’re happy with the cake layer, sprinkle the white and dark chocolate chips over the top (fun, fun!).

In another mixing bowl, combine the sweetened condensed milk, cream cheese & ½ teaspoon of vanilla extract, stir until well combined and pour milky mixture evenly over the cake dough. Bake for roughly 24 to 26 minutes, or until the edges begin to brown and pull away from the sides of the pan. Remember, you can always use a small pairing or serrated knife to cut off the browned edges. The middle will still be quite soft & jiggly upon removing from the oven but never fear, this will continue to set up more after they are cooled. Cool completely on a rack for about 30 to 45 minutes before carefully slicing them up into bars. If not serving immediately, store refrigerated in an airtight container for up to 5 days.

So what say you? Think you’ll be able to handle the craziness of this glorious lip smacking concoction? You might want to have a tall glass of milk handy when you do! *hint hint* Good luck!