Happiness Project #30: S’mores Cookie Sliders!

IMG_5772In two short days, my baby girl will be 9 months old! And although I’m fiercely excited about all of her developments (just yesterday, she tried repeatedly to pull herself over her baby gate! On top of the fact that she’s now standing, waving, high five-ing everyone she sees and has FOUR teeth already!), it’s still very bittersweet to me as well. At nearly nine months already, her babyhood is fast coming to an end, and because she is my only child (unless we’re able to adopt one day), I can’t help but want to slow it all down. Wishful thinking, I know, but prevalent, none-the-less. *sigh* Oh, the beautiful, happy joys of babyhood! What a wonderous thing to witness!

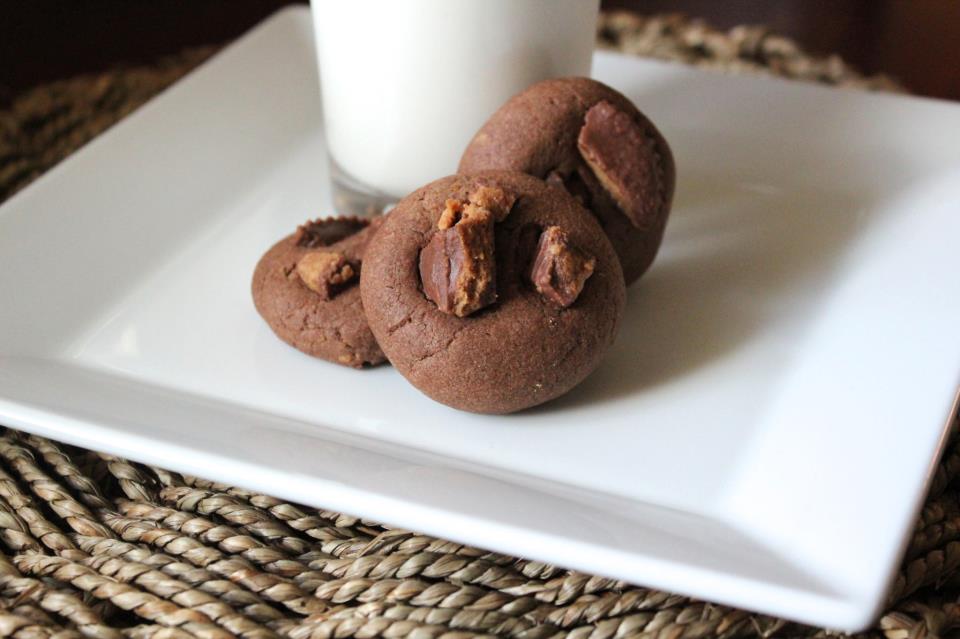
Mommyhood aside, a couple of months back, one of my cousins pinned a drool-worthy S’mores dessert on Pinterest (Oh, Pinterest!) and ever since then, I’ve been dying to create my own modernized party version of it! Hence these perfectly messy cookie sliders! The best part about this new recipe though, besides it’s triple chocolate yumminess? It’s quite easy to assemble as well as very family friendly! AND there’s NO baking required! You just have to be rather quick at multitasking! Seriously quick! Or else and better yet, this is one of those rare assembly recipes that the whole family can help out with! So grab a family member or two, throw on some holiday music and get messy with this delicious S’mores treat! Ready?

First up: the cookie dough truffles! You’ll need…

1-1/2 cups all-purpose flour

1/2 cup unsweetened cocoa powder

3/4 teaspoon baking soda

1/2 teaspoon salt

1/2 cup unsalted butter, softened at room temperature

1-1/2 cups granulated sugar

1/2 cup creamy peanut butter

2 large eggs

1 teaspoon vanilla extract

12 oz bag of chocolate candy melts

In a small bowl, mix the flour, cocoa powder, baking soda and salt with a wire whisk and set aside. In a 2nd bowl, on a stand mixer (or by hand), cream the butter, granulated sugar and peanut butter for 2-3 minutes until well mixed. Add the eggs and vanilla and mix until also well combined. Now add the flour mixture, in the 1st bowl, to the wet mixture and mix gently, at your mixers lowest speed, until throughly mixed. At this point, the dough might be a bit too wet to handle so pop the bowl in the fridge until the dough is stiff enough to roll easily. By hand, roll up the dough into 1-1/2 inch balls. I always recommend rolling your dough by hand verses by a cookie scoop because with the hand rolling technique, it’s easier to create a firmer, more perfectly circular ball. Try it out to see (and feel) the difference! 🙂 *This cookie recipe will make up to 20 dough balls.*

Next, line a baking sheet with either a Silpat mat or parchment paper and fill up the entire baking sheet with evenly spaced chocolate dough balls. Place the baking sheet with the chocolate dough balls in the freezer for 20-30 minutes to chill.

While your dough balls are chilling, this is the perfect time to set up your graham cracker/marshmallow assembly station. You’ll need…

1 box of Graham Crackers *gently cut or break each full sized graham cracker in half. *You will need up to 20 graham cracker halves.*

1 bag of large marshmallows

On a large microwavable plate, place 1 marshmallow on top of each halved graham cracker. Set them all aside.

2-3 minutes before you’re ready to take the chilled chocolate dough balls out of the  freezer, empty the entire 12 oz package of chocolate candy melts into a medium sized microwavable bowl. Heat up the candy melts, in three to four 20 second intervals until the chocolate candy is completely melted and smooth. Set aside.

Ready to take out those chilled cookie balls? Please do! Before you start dipping away though, you’ll need to soften the marshmallows you’ve assembled on their graham crackers. Softening them will create the cushion (or slight indentation) that the dipped cookie balls will sit on.

Depending on the strength of your microwave, warm up each marshmallow until they are ever so slightly softened (my microwave was set at 14 seconds). Just enough so that you can gently press your finger down into the center of each marshmallow to create a slight cushion (or indentation).

Now, the messy part! With a large slotted spoon, dip a cookie ball into the melted chocolate until the ball is throughly coated. *Oh, and just in case I didn’t mention it before, you might want to wear an apron for this! This can get very messy!* With the tip of the spoon, gently tap off the excess dipping chocolate (if you want a smoother cookie texture). Gently and carefully, transfer the coated cookie onto the cushioned marshmallow. Repeat for the rest of the cookie dough balls. Once all of your S’mores Cookie Sliders are fully assembled, stick them, covered, in the fridge until serving.

See? What did I tell you? Fun AND easy! A perfect treat for all of those holiday family gatherings! So get to it and get messy! Nom! Nom!

Happiness Project #29: Peanut Butter Oatmeal Surprise Cookies!

Image

Wow! What a crazy, beautiful, wondrous whirlwind these past 7 months have been. After two major surgeries, countless hospital stays and unexpected visits to the ER, there’s one thing I’ve found most prevalent: my baby girl makes it all worth it. With every little smile, every big giggle, every tiny reaching hand, this little girl is my everything. She is the meaning of everything good and heroic in this world. She is the meaning of love. My love. And even though being a new Mom means temporarily sacrificing some of my own favorite things, like baking and blogging, I wouldn’t have it any other way. She makes it all so very, very worth it.

So to celebrate returning to the midnight land of baking and blogging, I’m thrilled to be posting this newish cookie recipe. Chocked full of all the yummy things a heart could most desire. You want Peanut Butter? Check! And Oatmeal? You got it! What about some Chocolate? Yes. Please. Then this, my friends, is the cookie for you! A cookie, that in all likelihood, may be the mother of all party cookies. Especially for all of the kids in your life (or those who are big kids at heart). Now some might say that having a cookie studded so liberally with chocolate chips, peanut butter chips AND chocolate M&M’s might be just a tad overkill. I, however, think not. This is one of THOSE cookies that will have everyone around you begging for more. Don’t believe me? See for yourself!

1/2 cup salted butter, softened at room temperature

1/2 cup dark brown sugar

1/4 granulated sugar

1 cup creamy peanut butter

1 egg

1 teaspoon vanilla extract

1/2 teaspoon baking soda

1-1/4 cup all purpose flour *substitute with gluten free flour if preferred*

3/4 cup quick (cooking) oats *substitute with gluten free quick oats if preferred*

1/2 cup M&M’s

1/2 cup chocolate chips

1/2 cup peanut butter chips

Firstly & most importantly, preheat your oven to 350F. Line two baking sheets with parchment paper or Silpat baking mats. If you haven’t yet experienced the wonder of a Silpat baking mat, then get yourself over to your neighborhood baking supply store (Bed, Bath & Beyond, Sur La Table etc..) and get one! They are a bakers godsend! Trust me!

In a large bowl, by hand or stand mixer, cream together the softened butter and both sugars until light & fluffy. Mix in the peanut butter, egg and vanilla extract until well mixed, scraping down the sides of the bowl as necessary (to prevent lumps from forming in the batter). Slowly add in the baking soda and flour, for a minute or two at your mixers lowest setting, until just incorporated. Using a wooden or plastic spatula, fold in the quick oats, M&M’s, chocolate chips and peanut butter chips.

Roll the dough, either by hand or cookie scoop, into 2 to 3  inch balls and line them up on each cookie sheet. Pop them into the oven and bake for 9-10 minutes: around 9 minutes for a softer cookie or 10 minutes for a slightly firmer cookie. I like a little bit of both so I tend to bake mine for 9-1/2 minutes.

After retrieving them from the oven, let them set up a bit more on the cookie sheet for another 5 minutes before gently transferring them to a cooling rack. Store in a airtight container for up to 5 days for maximum freshness. Or you can do what I always do, and eat them all, then and there. That’s the whole fun of baking after all, right? *wink*

Happy Baking, my friends! Hopefully, I’ll be back very soon with another stealthy recipe to share!

*Recipe adapted from sally’s baking addiction

Happiness Project Recipe #27: Mini Chocolate Chip Cookie Cheesecake Cups!

Image

With only 3 weeks to go before I hit 40 weeks in my pregnancy, I have this unexplainable feeling that next week might be THE week! Within this past week, I’ve been a bundle of nervous, anxious, excited energy & this unexpected onslaught of emotions has left me feeling a bit off balance. All of a sudden, something akin to fear hits me. All predominately based on very normal parenting uncertainties. Will I be a good Mother? Do I have what it takes to be everything that my little girl truly needs? Fortunately, I’m sensible enough to know that most first time, new moms feel like this, to various degrees. That’s simply how life is when embarking on a mementos new adventure. The most important adventure a person can possible begin: that of becoming a parent. So in lieu of all of my jumpy emotions, I wanted to squeeze in one more recipe before what I suspect might be THE big week. And since one of my very first pregnancy cravings was for a classic vanilla bean cheesecake, I decided to end (temporarily) on a similar note. With cheesecake, in my favorite dessert form: a cupcake. Although I had originally planned on using mini chocolate chips within the recipe, I ended up settling for standard sized chocolate chips instead, after discovering a sadly diminished lack of mini chocolate chips in my baking cabinet (tis a sad day, indeed). Overall, using a standard sized chocolate chip certainly did not take anything away from the desired taste. If anything it packed an even heftier punch of chocolate, which isn’t actually a bad thing, right? So here it is…

Crust:

1 cup graham cracker crumbs

2 tablespoons brown sugar

pinch of kosher salt

3 tablespoons salted butter, melted

Cheesecake:

8 ounce package of cream cheese, softened at room temperature

2 tablespoons sour cream

1/3 cup granulated sugar

1 egg

1 teaspoon vanilla extract

1/2 cup mini chocolate chips

Preheat your oven to 350F. Line 12 cupcake tins with paper baking liners.

In bowl #1, mix together the graham cracker crumbs with the brown sugar and salt until well combined. Pour in the melted butter and mix with your fingers until evenly coated and crumbly.

In a 2nd large bowl, on a stand mixer, cream together the cream cheese, sour cream and sugar until smooth, scraping down the sides of the bowl to prevent any lumps in the batter from forming. Beat in the egg and vanilla extract until well combined. Set aside.

In your cupcake pan, scoop up about 1-1/2 tablespoons of the graham cracker crust into each paper liner, pressing the crumbs down into a nice, even layer. Now, evenly divide the cheesecake batter between the cupcake liners, pouring the batter over the graham cracker bottom, filling each liner nearly to the brim. Sprinkle however many mini chocolate chips over the top of the cheesecake batter as you desire.

Bake for 18-21 minutes until the tops are nearly completely firm to the touch. Remove the cupcake pan from the oven and cool on a wire rack for about an hour before popping them into the refrigerator for another 2 hours to let them set up correctly. When not serving immediately, store in a airtight container in your refrigerator for up to 3 days.

Happiness Project Recipe #26: Funfetti Birthday Cookies!

Image

Oh birthdays! For the most part, I’m usually quite apathetic towards birthdays. To me, age is just a number, nothing more, nothing less. I don’t live my life by my age, I live my life by my heart, as corny or sappy as that may sound. So whenever February comes around, turning one year older doesn’t usually inspire an overwhelming need for any unnecessary personal validation. However, there is one thing that I truly love about birthdays. Dessert. Be it in the form of a cake, cookie or cupcake, I MUST have my birthday dessert. Nothing else matters more to me than that one, sugary, bite-full of yummy, blissful sweetness. Seriously, nothing. So to celebrate turning 35, I decided that pudding and sprinkles was exactly what I needed most. And since lately the cookie monster within me has been consuming nearly everything in sight, funfetti cookies seemed perfect for the occasion. And what a fun and easy recipe this is!

3/4 cup salted butter, softened at room temperature

3/4 cup brown sugar

1/4 cup granulated sugar

1 (3/4 oz) package instant vanilla pudding mix

3/4 cup yellow cake mix, dry

2 eggs

1 teaspoon vanilla

1 teaspoon baking soda

2-1/4 cup all-purpose flour

1/2 teaspoon kosher salt

Handful of sprinkles

Preheat your oven to 350F.

In a medium sized bowl, stir together the flour, baking soda and salt. Set aside.

On a stand mixer, cream the butter and sugars together until light and fluffy.

Add in the cake mix and package of dry, vanilla pudding until well blended.

Add in the eggs and vanilla and mix well.

Slowly add in the flour mixture, scraping down the sides of the mixing bowl to eliminate any lumps from forming in the batter.

Mix in that handful (or two) of sprinkles.

Using either a cookie scoop or rolling by hand, drop 1-1/2 inch dough balls onto a sprayed or Silpat lined baking sheet.

Bake for 10-12 minutes before removing from the oven and cooling on a wire rack.

See? Very quick, easy recipe! Kid friendly too *wink*


Happiness Project Recipe #25: “Thank You” Peanut Butter Cup Chocolate Cookies!

Image

As a THANK YOU to my husband, twin sister and closest girlfriend for painting Arianna’s nursery room yesterday, I found myself in the kitchen at 2am whipping up a new chocolate cookie recipe (oh the joys of pregnancy insomnia). With Reeses Peanut Butter Cups. And so you ask, “ANOTHER recipe involving chocolate and peanut butter??” But of course! Who would I be without some chocolate involved? *wink* And no, I’m not hesitant at all about expressing my adamant LOVE for this plump, decadent morsel! This is by far one of the best chocolate cookies I’ve ever tasted! Now I’m sitting here staring at a tupperware container half filled with these peanut buttery swirled beauties while unsuccessfully attempting to restrain my hungry, pregnant self from consuming them all in one mere sitting. This is not an easy thing to do, my friends. Not at all. So in an attempt to feel less guilty about my obsessive tendencies towards gleeful, unbridled consumption, now it’s your turn…

1-1/2 cups all purpose flour

6 tablespoons unsweetened cocoa powder

1/2 teaspoon baking soda

1/2 teaspoon kosher salt

6 tablespoons unsalted butter, softened at room temperature

1/2 cup creamy peanut butter

1/2 cup granulated sugar

1/2 cup brown sugar

1 egg

1 teaspoon vanilla extract

2 tablespoons whole milk

1-1/2 cups coarsely chopped frozen peanut butter cups

Preheat your oven to 350F. Line 2 baking sheets with Silpat baking mats or parchment paper. Freeze your 1-1/2 cups peanut butter cups for 30 minutes before chopping them up with a serrated knife into small pieces. They will be much easier to handle when frozen.

In a large mixing bowl, combine the flour, cocoa powder, baking soda and salt. Stir to combine. In another large bowl on a stand mixture, beat the butter, peanut butter and sugars until light and fluffy. Blend in the egg, vanilla extract and milk until smooth. Mix in the dry ingredients until just combined. Gently fold in 3/4 cups of the chopped peanut butter pieces.

Using either a cookie scoop or rolling by hand (I always roll my cookies by hand), drop 1 to 1-1/2 inch dough balls onto your lined cookie sheets. Gently press in the remaining 3/4 cups of chopped peanut butter pieces into the top of each dough ball (FUN!!). Bake for 12-14 minutes.

Remove from the oven and let cool on a wire rack before serving or store them in an airtight container (for up to 3 days).

Drooling yet? *wink*

Happiness Project Recipe #24: Lemon Cream Sugar Cookies!

Image

Since Lemon just happens to be my 2nd favorite dessert flavor, I knew that I just HAD to create a new Lemon recipe for my family’s 2012 Christmas gathering! Particularly since my Mom was the very person who first turned me on to this lovely, citrus filled delight many a year ago. So casting aside my usual chocolate drenched ambitions, I finally tried my hand at a new sugar cookie recipe. One in which I joyfully incorporated my all time favorite indulgence: frosting! Although the 1st trial run with a classic buttercream frosting turned out quite well, the superior frosting snob that I am simply could not settle for anything less than absolute perfection. Hence this now pleasantly altered buttercream recipe, featuring cream cheese as it’s star flavor! The result? Sugar cookie perfection.  At least I think so.

Cookies:

1/2 cup salted butter, softened at room temperature

1/2 cup butter flavored crisco

1 cup granulated sugar

1 teaspoon vanilla extract

1 egg

2 tablespoons lemon zest (approximately 2 lemons)

2-1/2 cup all purpose flour

pinch of kosher salt

1/2 teaspoon baking soda

1 tablespoon whole milk

1 tablespoon lemon juice

Frosting:

1/4 cup salted butter, softened at room temperature

8 oz cream cheese, softened at room temperature

1/2 teaspoon vanilla extract

2 cups confections sugar, sifted

pinch of kosher salt

2 tablespoons lemon juice

Preheat the oven to 350F.

In a large mixing bowl on a stand mixer, cream the butter, crisco and sugar until light and fluffy (2-3 minutes on medium speed). Mix in the vanilla, egg and lemon zest. In another bowl, sift together the flour, salt and baking soda. Add the dry ingredients into the wet mixture until just incorporated. Stir in the milk & lemon juice until well combined.

With a small cookie scoop, roll your dough into 1 to 1-1/2 inch balls, placing them on a Silpat lined or lightly sprayed cookie sheet. Using either your fingers-tips or a spatula, gently press each dough ball flat. Bake for 10-12 minutes until the edges begin to brown ever so slightly. Remove from the oven and cool on a wire rack.

Onward to the frosting! In a large mixing bowl, on a stand mixer, beat the butter and cream cheese together until smooth and glossy. Slowly beat in the vanilla extract. Add in the confections sugar and salt until well combined. Last but not least, stir in up to 2 tablespoons of the lemon juice.

And now to what you’ve all been waiting for: frosting these heavenly bite sized cookies! As with anything involving frosting and cookies, decorating can be as messy or as pretty as you so chose it to be. Using either a spoon, a butter knife or even a pastry bag fitted with a large round decorating tip, frost, frost, frost away! And don’t forget to add in your favorite colored sprinkles! Sprinkles make everything better =)

Happiness Project Recipe #23: Cookies & Cream Cheesecake!

Image

Oh cheesecake! Oreo. Cheesecake. The best of both worlds combined into one tasty, decadent bite! During my 1st trimester, one of my daily cravings was the single serving vanilla cheesecake from Jack In The Box. A craving which I couldn’t help but indulge in far more often than what was technically considered healthy. So even now at 31 weeks, it’s no surprise that I’ve once again become a wee bit obsessed with this one particular dessert. Hence this new, very fun recipe. With Oreos. Did I mention Oreos? *wink* The ONLY downside to this yummy, drizzled concoction? These little niblets are almost too decadent for single mass consumption. Trust me. I know. Don’t believe me? Try these. I dare you.

36 Oreo Cookies (24 for crust bottom, 12 for cheesecake batter)

1/4 cup salted butter, melted

4 (8) ounce packages of cream cheese, softened at room temperature

1 cup granulated sugar

1 cup sour cream

1 teaspoon vanilla

4 eggs

1/2 cup milk chocolate chips (for drizzle garnish)

Preheat your oven to 325F. Line a 9×13 inch baking pan with aluminum foil,  leaving enough side foil to hang over the edges of the pan.

Finely crush up 24 Oreos for the crumb bottom. Melt the butter in a microwave safe bowl and then mix well with the crushed Oreos. Press the mixture onto the bottom of the pan. Yes, this will be quite sticky so have patience while gently and firmly pressing out the entire mixture, making sure to create nicely formed edges at each corner.

For the cheesecake batter, using a large bowl on a stand mixer, beat the cream cheese and sugar until fully incorporated. Blend in the sour cream and vanilla. Add the eggs, one at a time, scraping down the sides of the bowl with a spatula after each addition. Roughly crush or chop up the remaining 12 Oreo cookies and gently fold them into the batter. Now pour the batter over the cookie crust.

Bake the cheesecake for 35-40 minutes, until the edges are firmly set and the center is nearly fully set. Cool on a wire rack for at least 1 hour before covering with plastic wrap and chilling in the fridge for 2-1/2 to 3 hours. Once the cheesecake is sufficiently chilled, take the cheesecake from the fridge and remove from the pan, using the foil overhang. Using a small pairing knife, cut up the cheesecake into whatever desired sized pieces you want. Set the cut pieces onto a parchment or Silpat lined baking sheet: you might get a wee bit messy with the chocolate drizzle.

For the drizzle, heat up the chocolate chips in a microwave safe bowl until fully melted. Using either a pastry bag with a small, round decorating tip or a Ziploc bag (sniped at the bottom corner), pour the chocolate into the bag and drizzle as much or as little onto the cheesecake pieces as your hungry heart desires.

If not serving immediately, cover with plastic wrap and chill in the fridge until ready for consumption. Mass consumption. Party-worthy consumption.

Your friends and family will worship you forever for this!

Happiness Project Recipe #20: Southern Mama Chocolate Coca-Cola Cake!

Image

Coca-Cola in cake?? Yes, please! Why though have I never before indulged in this sweetened, chocolaty delight?? Perhaps, because before now, I had never heard of such a lovely cake! So for the 1st time since recovering from my surgery (and after being horribly sick for the past 2 & a half weeks), I finally felt well enough to be up and about in my kitchen, trying out this new recipe. Oh kitchen, how dearly I’ve missed thee! Regardless of the fact that I generally stay as far away from soda as I can (considering how truly disgusting and tragically unhealthy the drink itself is), I was very intrigued by the idea of combining coke with chocolate and was not disappointed with the end result. So here it is, my soda loving friends! Come and get your fix on!

2 cups all-purpose flour

1 teaspoon baking soda

1 1/2 cups sugar

1 cup (2 sticks) salted butter

1 1/2 cups mini marshmallows

1/2 cup semi-sweet chocolate chips

1/4 cup cocoa (I swear by the Ghirardelli brand)

1 cup Coca-Cola

1/2 cup buttermilk

2 eggs

2 teaspoons vanilla

Icing

1/2 cup salted butter

1/3 cup Coca-Cola

3 tablespoons cocoa

3 1/2 cups powdered sugar

1 tablespoon vanilla

*1/2 cup finely chopped pecans (optional) or 1 scoop of vanilla ice cream per serving

Preheat your oven to 350F

In bowl #1, combine the flour, baking soda and sugar. Blend well. In a medium saucepan, throw in the butter, marshmallows and chocolate chips. Cook over medium heat until everything is nicely melted and bubbling slightly in the pan. Remove from the heat and stir in the cocoa. Set aside and let cool slightly. Now add the Coca-Cola, buttermilk, eggs and vanilla to the dry ingredients (bowl #1), stir until just combined. Slowly add the slightly cooled butter/marshmallow/chocolate chip/cocoa mixture and mix until combined.

Pour the batter into a greased or sprayed 9X13 pan and bake for 30-35 minutes until a toothpick inserted in the cakes center comes out clean. Set your cake aside to cool slightly while you’re preparing the icing.

For the icing, combine the butter, Coca-Cola, cocoa and powdered sugar in another saucepan, heating on high until just boiling. Remove from the heat and stir in the vanilla. Now comes the very important part. Quickly and evenly pour the hot icing over your slightly cooled cake. The faster you pour the hot icing over the cake, the less likely it will start hardening up (a lesson I learned the hard way today). Now, if desired, sprinkle with pecans. Although this cake is best when served warm, it will still taste quite flavorful when fully cooled as well.

*Don’t want to use a pecan topping? How about a scoop of lovely vanilla ice cream on each serving instead!*

So go grab that pack of tempting, unused soda and do something creative with it! Tis a very yummy, sweet and fun cake, if I say so!

Happiness Project Recipe #19: “Love, Baby” Vanilla Sprinkle Donuts!

Oh lovely, yummy, drool worthy donuts! How dearly I heart thee! Besides my weekly cravings for peaches, pizza and curly fries, lately donuts have set my taste buds a wildly a-spinning as well! However, for the sake of my baby’s fast developing health, this is one craving which I will not so easily cave in to. Why? Just because I happen to be an obsessive dessert junkie, does not mean I want my little one to become one as well! Very soon, I shall begin experimenting with more fruit based recipes versus my usual sugar and cream based desserts, which will be a fascinating new (and exciting) adventure for me! There’s never a better time than the present to change some of my rather “unhealthy” eating tendencies, right? Right! So for those of you who are still hankering for a yummy, sprinkled dessert, you must try this recipe! Due to the lack of needing to oil or fry anything (like you would with a traditional donut), anyone, no matter what level of baker you are, can very easily re-create this cake-like donut recipe! And you will love it! Yes, you will! Ready? Set? Go!

Donuts:

2 cups all purpose flour

2/3 cup sugar

2 teaspoons baking powder

one large pinch of ground cinnamon

1 teaspoon kosher salt

12 tablespoons low fat buttermilk

2 large eggs

2 teaspoons vanilla extract

2 tablespoons melted, salted butter

A handful of rainbow sprinkles for garnish

Vanilla Glaze:

1 cup powdered sugar

1 teaspoon vanilla extract

3-4 tablespoons whole milk

Preheat your oven to 325F. Lightly coat a donut pan (I bought mine at Sur La Table) with cooking spray.

In a large bowl, combine the flour, sugar, baking powder, cinnamon and salt. There’s no need to break out your trusty stand mixer with this recipe though! You can easily do this by hand. Pour in the buttermilk, eggs, vanilla and melted butter and stir until just combined. Your batter will be very sticky and will resemble a thick, dough like consistency.

For this next part, there are two different methods you can use to distribute your batter. You can either use a professional icing bag with a round decorating tip of any size or you can create a make shift piping bag with a Ziploc bag (by cutting an opening in the bottom corner to form a tip) to pipe out your batter. Divide your batter evenly among the donut wells: this recipe will make you around 8 to 10 donuts, depending on how thickly you choose to pipe them out. Bake for 8-9 minutes until the donuts spring back to the touch. Let your donuts cool completely on a wire rack before you ice them with the vanilla glaze. To create the glaze, in a small bowl, combine the powdered sugar with the vanilla extract and whole milk. Stir with a spoon until smooth and glossy. With that said spoon, you can now drizzle the glaze over the donuts or if you’re feeling adventurous (and comfortable with getting messy), dip the top halves of your donuts into the actual glaze. Oh, such messy fun! To finish it all off, top with those rainbow sprinkles.

See? I told you it was this easy! So go get that donut fix on! I dare you!

Happiness Project Recipe #18: Peanut Butter Chocolate Chip Brownie Bars!

Image

In all of my 34 years, one of the things I’ve learned most about myself is that once I set my mind (or heart) to doing something, I do it. With 110% of my entire being. And I tend to like to do things on my own, without needing to rely on the help of anyone else (yes, I can most definitely be quite the stubborn perfectionist at times). But since becoming pregnant, I’ve had to re-learn the importance of asking for a little bit of assistance every now and then, particularly in regards to certain physical activities, like carrying full bags of groceries or moving my trusty (& quite heavy) Kitchen Aid stand mixer from one counter to the other (thanks be for a wonderfully helpful husband!). There are, after all, certain things that a pregnant woman should not be doing on her own, as I’ve been repeatably (& lovingly) reminded. So after gathering up all of the paint supplies I needed for re-painting our master bedroom this weekend, my sister threw another pregnancy “No, No” my way. When pregnant, there will be absolutely NO painting! Of any kind! Which pretty much threw my whole “I will paint the entire master bedroom on my own (by choice) this weekend,” plan askew. Therefore meaning that my Imzadi would have to do the entire bedroom on his own, without me. The catch, you ask? I happen to really LIKE painting whereas my Imzadi most decidedly does not. Hence the dilemma. So what did I do as soon as I got home & was able to freely & legally text again? I issued a “need help” plea to some of our closest friends. And true to form, these friends rallied selflessly to the cause. So as a THANK YOU to our wonderful friends for volunteering to help my Imzadi paint our bedroom tomorrow morning, I did what I do best whenever my cup runneth over. I baked up a little something special, just for them. My THANK YOU recipe? Peanut Butter Chocolate Chip Brownie Bars! Because who doesn’t like some peanut butter with their chocolate?? I do! Yes, yes, I do!

2 large eggs

1 cup granulated sugar

1/2 cup packed brown sugar (either light or dark)

1/2 cup creamy peanut butter

1 teaspoon pure vanilla extract

2 tablespoons unsalted butter, softened at room temperature

1 1/4 cups all-purpose flour

1 teaspoon baking powder

1/2 teaspoon kosher salt

1/2 cup semi-sweet chocolate chips

Grease or spray a 9X9 inch baking pan with butter. Dust lightly with flour, gently tapping out the excess (preferably over a sink to alleviate a potentially messy cleanup). Preheat your oven to 350F.

In a stand mixer (or by hand, if you’re prepared to use some elbow grease), beat the eggs and both sugars until smooth. Add the peanut butter and continue mixing until well combined. Beat in the vanilla and butter and mix until thoroughly incorporated.

Once you’ve measured out the flour, baking powder and salt, sift all three directly into the batter. Mix gently on a low speed until well combined and no trace of the dry ingredients remains. With a wooden spoon, stir in the chocolate chips by hand.

Now, using a rubber spatula, pour the dough into the prepared pan and spread out the entire batter by gently pressing and finessing. The batter will be quite sticky so keep pressing until you reach a desired evenness. Bake for 23-25 minutes until the edges start to brown slightly and the center is springy to the touch. Remove from the oven and let cool on a wire rack for 45 minutes to 1 hour before cutting up into bars. Quick tip: using a serrated or small pairing knife is ideal when cutting up even shaped bars.

This will make you approximately 12-16 bars.

If not consuming immediately, you can store them in your fridge in an airtight container for up to 3 days.

Aren’t thank you’s delicious? *wink, wink*

*Recipe adapted from “Fat Witch Brownies.”