Happiness Project #32: Chocolate Orange Pound Cake!

Image

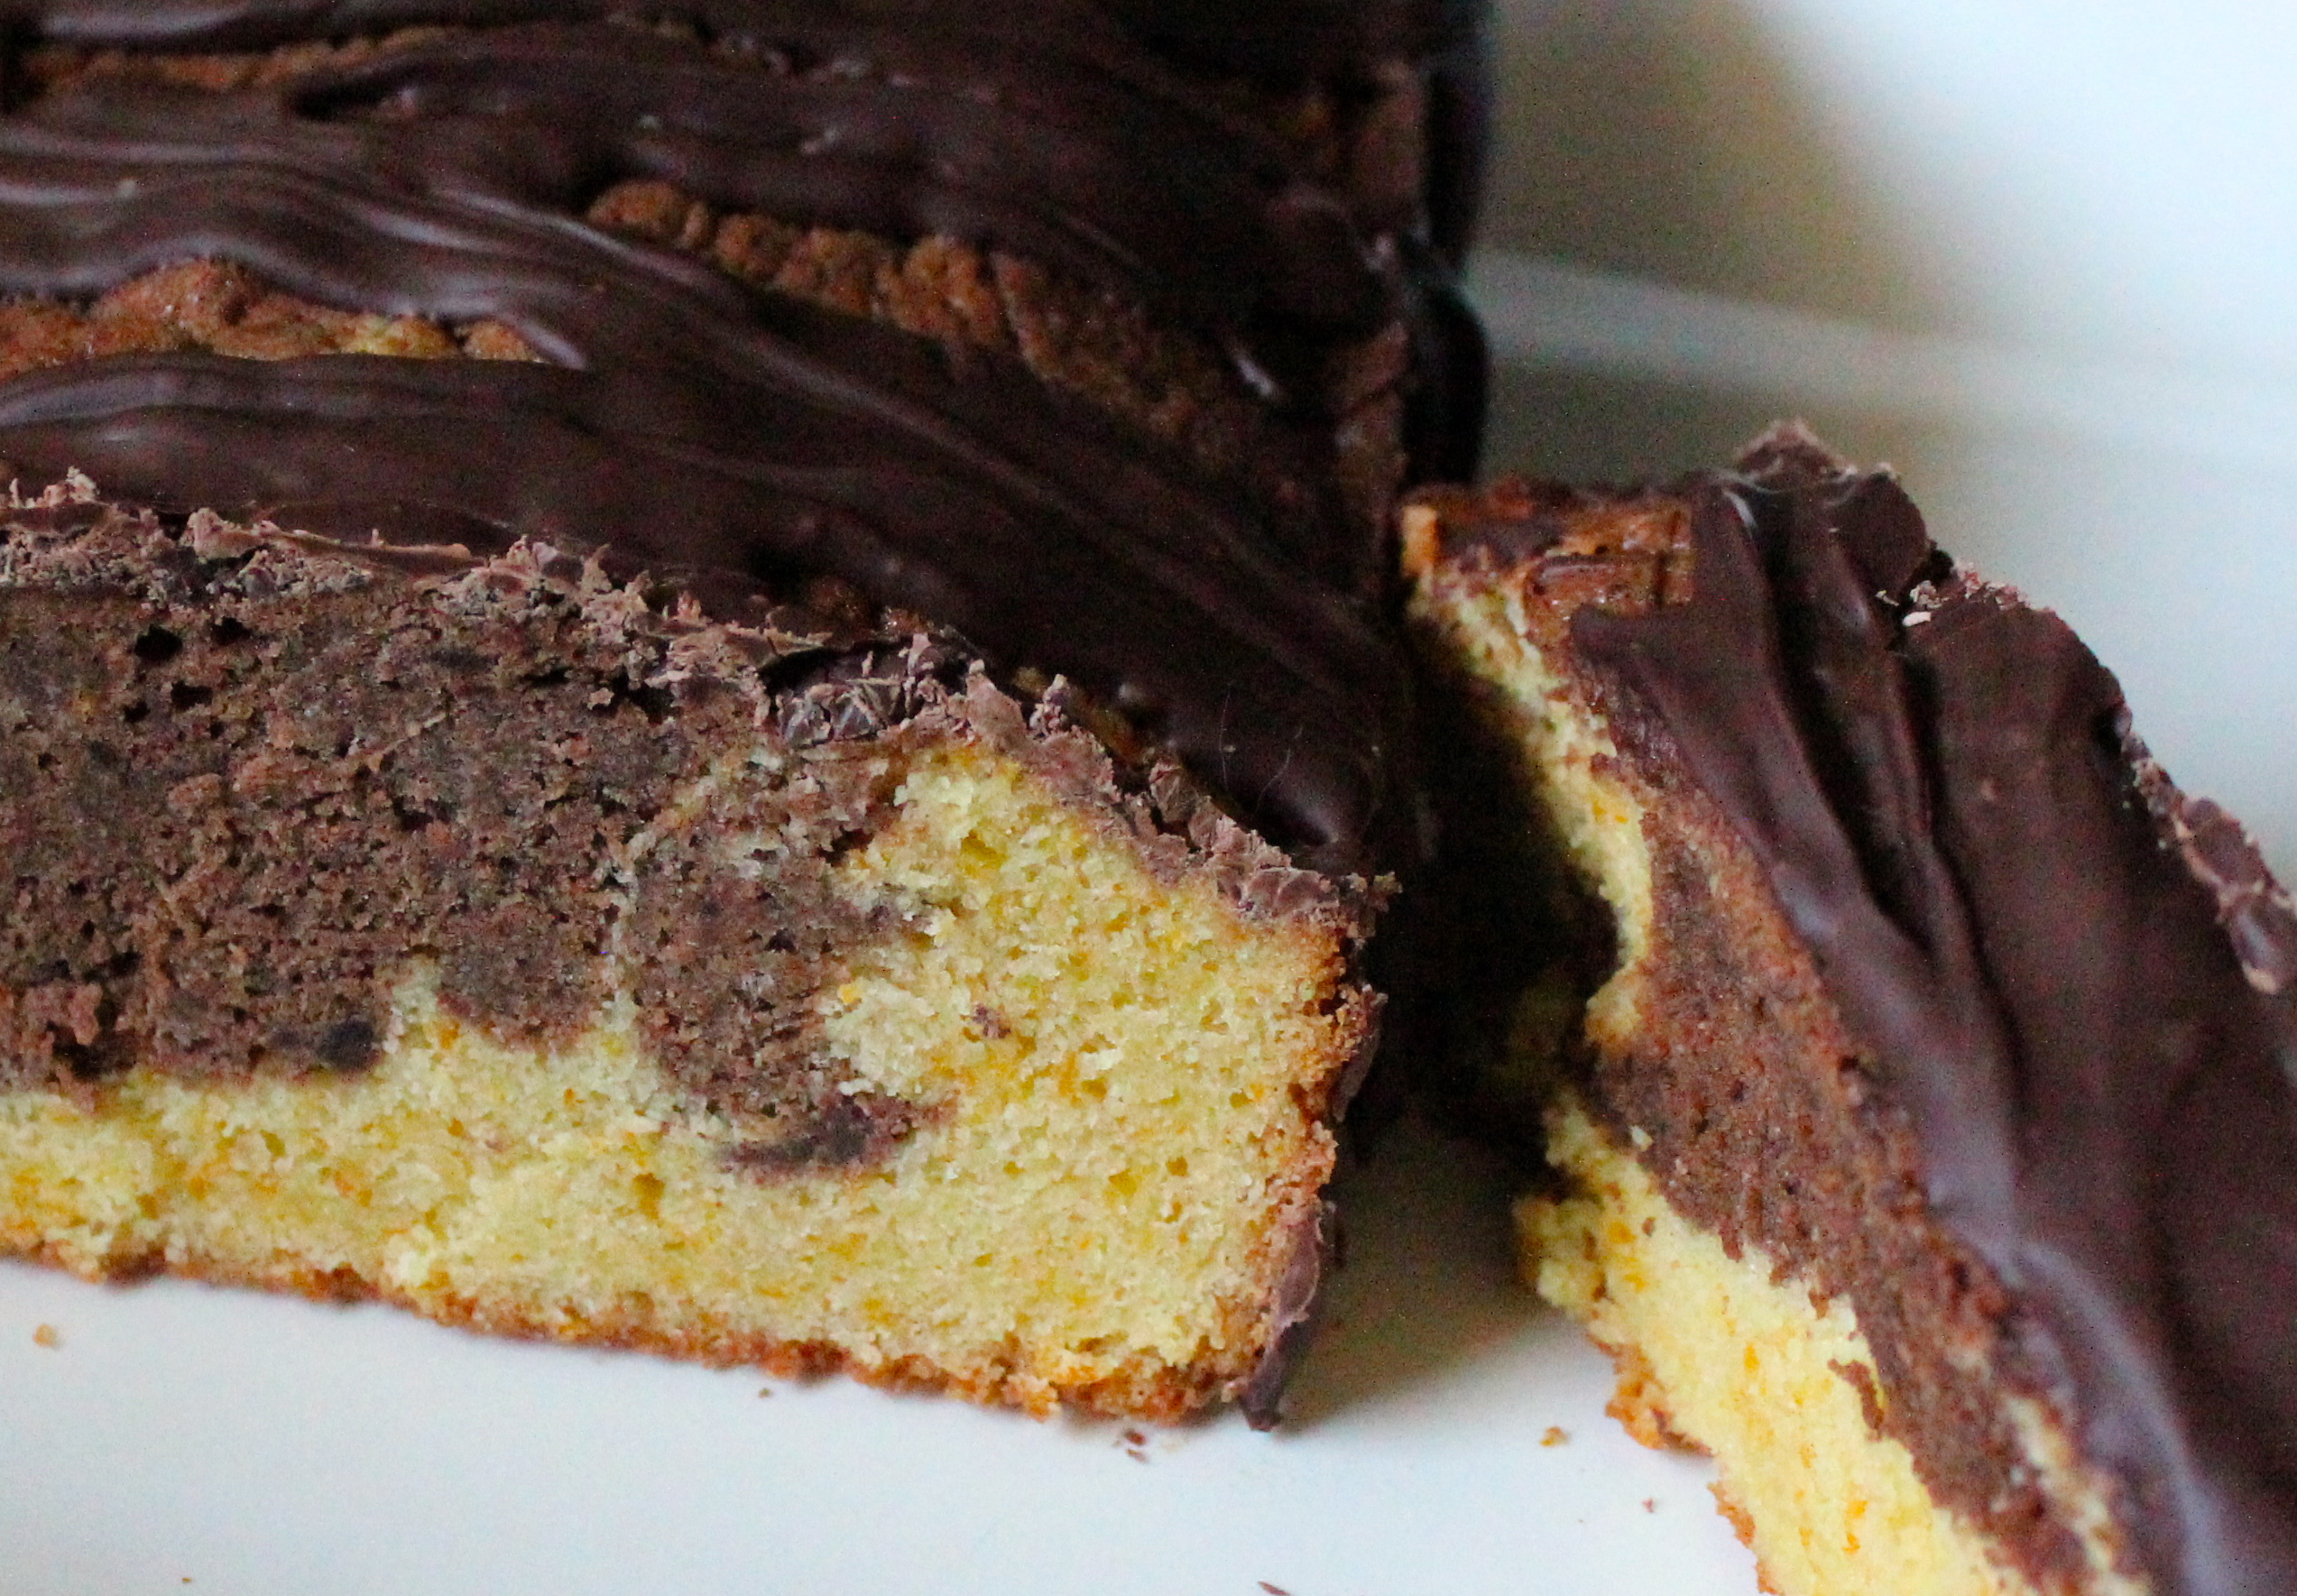
Mmmmmm! Orange and chocolate. Since nearly every HP dessert I’ve done since first creating this blog nearly 2 years ago has mostly involved chocolate, I thought it was high time to throw some citrus into the mix. And since I’ve never experimented with oranges before (for shame, right?), I ended up whipping up a very traditional Chocolate Orange Pound Cake recipe. Traditional because I did absolutely nothing to change the actual recipe, though I might add some chocolate chips into the mix the next around. And WOW, was this one of this easiest yet quickest cakes I’ve ever done! One, which not only smelled DIVINE while puffing up in my oven but tasted even better the second day out! Need to whip up something yummy that everyone will like but don’t have much time to do so? Then this, my friends, is the perfect cake for you!

1 cup salted butter, softened at room temperature

1 cup granulated sugar

4 eggs

1 cup all-purpose flour

2 tablespoons whole milk

3 tablespoons unsweetened cocoa powder

The zest from 1 large orange

1/2 cup semi-sweet chocolate chips, melted (for drizzle)

Preheat your oven to 350F. Butter and lightly flour 1 small loaf pan. Or butter up a muffin pan for yummy, breakfast treats instead! Have kids, anyone?

In a bowl on your stand mixer, cream together the butter and granulated sugar until smooth and creamy. Add in the eggs, one at a time, until well mixed, followed by slowly sifting in the all-purpose flour.

Once blended, divide the mixture equally between two small bowls. In one bowl, add in the milk & cocoa powder and combine together. In the second bowl, beat in the orange zest until well mixed.

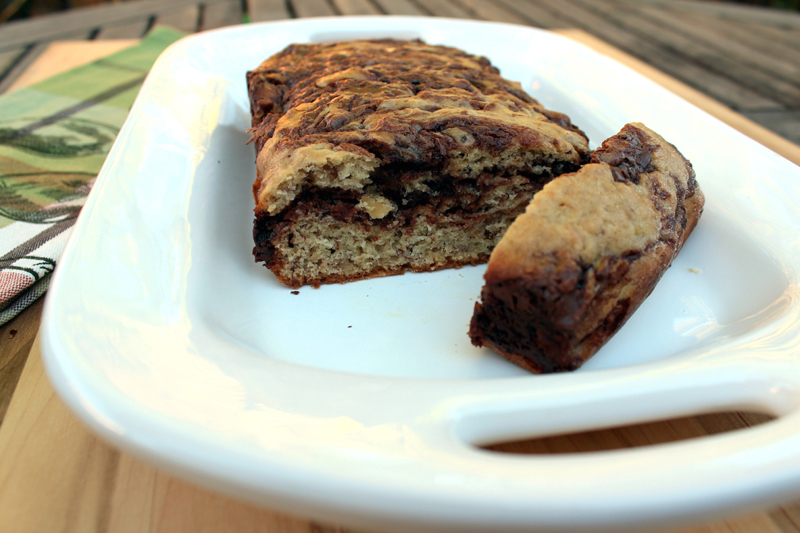
Spoon the mixture into the loaf pan, taking large alternate spoonfuls from each bowl. Using a fork, gently swirl the mixture together to create a marbled effect. Do not STIR the two batters together though or they will blend and you will lose the marbled effect.

Bake for up to 45 minutes until golden brown on the edges and top. With a toothpick, check to make sure that the cake is fully baked through in the center.

Let cool on a wire rack for a good 30 minutes before loosening the cakes edges with the flat side of a butter knife and removing from the pan.

To add the chocolate drizzle, heat up the 1/2 cup of chocolate chips in the microwave (20-30 seconds) until melted and smooth. Drizzle as much as preferred onto the top half of the cake. Or instead of drizzling melted chocolate, how about sifting powdered sugar on top, particularly if you (or you kids) are hankering for some breakfast muffins? Your kids will love you even more (because what child doesn’t love powdered sugar?) and most assuredly, ask for seconds =)

*Original recipe: BBC Chocolate Orange Loaf

Happiness Project #31: Merry Christmas Red Velvet Whoopie Pies!

Image

This year, or to be more accurate, last year, my twin sister REALLY wanted something Red Velvet for Christmas Eve, so the baker in me was undeniably all too obsessively happy to oblige! Enter the elusive Whoopie Pie. Firstly, what a rather festive, albeit somewhat silly, dessert name! Who comes up with this stuff, anyway?! Secondly, red velvet. Most of my family and close friends already know that I’ve never been a big fan of red velvet (desserts). If you’re going to give me chocolate then please just give me CHOCOLATE not COLORED chocolate. Chocolate is chocolate, right? Oh, SO wrong. Until I recently discovered a tub full of scrumptious red velvet cookies at Costco, nothing that I’ve tried has been impressive enough to replicate. But since making my family happy, makes me happy in turn, I went on a fairly exhaustive hunt for the best of red velvet dessert recipes. And was very pleased by what I found. At first, I thought about tinkering around with a red velvet cheesecake idea, yet as the hours until Christmas Eve started ticking down, I unexpectedly changed my mind. Since I still know a (surprising) number of friends & family who have never had the pleasure of tasting a Whoopie Pie before (some who have never even heard of the name), I knew it was the perfect opportunity to dapple around with one. With a twist. Why use something as simple as red food dye to color my cocoa when I could infuse it with actual red velvet flavoring instead? Which, to me, took these whoopie pies to the next level. Of yumminess. Don’t believe me? Try experimenting with both and you be the judge!

For the Pies:

2 cups all-purpose flour

3 tablespoons unsweetened cocoa powder

1 teaspoon baking soda

1 cup buttermilk, well shaken

1 teaspoon vanilla

1/2 cup salted butter, softened to room temperature

1 cup brown sugar

1 egg

1-1/2 tablespoons red velvet flavoring (or 2 tablespoons red food coloring) *I prefer using red velvet flavoring versus red food coloring because of how much richer the taste becomes with it)

Preheat your oven to 350F. Line 2 baking sheets with Silpat baking mats or parchment paper. You’ll need three separate bowls for this recipe, so add those to your placement of necessary kitchen tools. In bowl #1, whisk together the cocoa & baking soda. Set aside. In bowl #2, stir in the buttermilk, vanilla and red velvet flavoring until well mixed.  Set aside.

On a stand mixer, beat together the butter and brown sugar, at medium speed, until light & fluffy. Add in the egg until fully combined. After dropping your mixer speed to a lower setting, add in the flour, followed by the buttermilk mixture, in 3 separate batches. Always starting with and ending with the flour. Scrape down the sides of the bowl between each addition to create a smoother texture. Mix until just smooth (but do not over mix).

Now the fun and very pretty part! Using either a large cookie scoop or large spoon, drop up to 6 scoops of pie dough onto each lined cookie sheets. This will make you roughly 12 pie sides, equaling 6 fully assembled whoopie pies! Can I get a “Yum!”

Bake for 11-13 minutes. Whoopie Pies are meant to be a large, puffy type of “cookie” so don’t worry if you think that they are a bit soft once out of the oven. Cool throughly on a wire rack.

While your “cookie” pies are cooling, here’s what you’ll need for the cream cheese filling:

1 (8oz) package of cream cheese

1/2 cup unsalted butter, warmed to room temperature

1 teaspoon vanilla extract

2-3 cups powdered sugar

2 tablespoons heavy whipping cream

In a bowl on your stand mixture, add in the cream cheese, butter, vanilla extract and powdered sugar, mixing at low to medium speed until well combined and smooth. Mix in the heavy whipping cream and whip at high speed for 2-3 minutes.

Using a large spoon or large round decorating tip with a piping bag, spread a large dollop of filling onto one side of 6 of your whoopie pies. Press each 12 halves together and there you have it! 12 lovely, decadent Christmas Whoopie Pies! Your family or friends will adore these (and you for making them)!

Happy New Year and Happy Baking, my friends!

Happiness Project #29: Peanut Butter Oatmeal Surprise Cookies!

Image

Wow! What a crazy, beautiful, wondrous whirlwind these past 7 months have been. After two major surgeries, countless hospital stays and unexpected visits to the ER, there’s one thing I’ve found most prevalent: my baby girl makes it all worth it. With every little smile, every big giggle, every tiny reaching hand, this little girl is my everything. She is the meaning of everything good and heroic in this world. She is the meaning of love. My love. And even though being a new Mom means temporarily sacrificing some of my own favorite things, like baking and blogging, I wouldn’t have it any other way. She makes it all so very, very worth it.

So to celebrate returning to the midnight land of baking and blogging, I’m thrilled to be posting this newish cookie recipe. Chocked full of all the yummy things a heart could most desire. You want Peanut Butter? Check! And Oatmeal? You got it! What about some Chocolate? Yes. Please. Then this, my friends, is the cookie for you! A cookie, that in all likelihood, may be the mother of all party cookies. Especially for all of the kids in your life (or those who are big kids at heart). Now some might say that having a cookie studded so liberally with chocolate chips, peanut butter chips AND chocolate M&M’s might be just a tad overkill. I, however, think not. This is one of THOSE cookies that will have everyone around you begging for more. Don’t believe me? See for yourself!

1/2 cup salted butter, softened at room temperature

1/2 cup dark brown sugar

1/4 granulated sugar

1 cup creamy peanut butter

1 egg

1 teaspoon vanilla extract

1/2 teaspoon baking soda

1-1/4 cup all purpose flour *substitute with gluten free flour if preferred*

3/4 cup quick (cooking) oats *substitute with gluten free quick oats if preferred*

1/2 cup M&M’s

1/2 cup chocolate chips

1/2 cup peanut butter chips

Firstly & most importantly, preheat your oven to 350F. Line two baking sheets with parchment paper or Silpat baking mats. If you haven’t yet experienced the wonder of a Silpat baking mat, then get yourself over to your neighborhood baking supply store (Bed, Bath & Beyond, Sur La Table etc..) and get one! They are a bakers godsend! Trust me!

In a large bowl, by hand or stand mixer, cream together the softened butter and both sugars until light & fluffy. Mix in the peanut butter, egg and vanilla extract until well mixed, scraping down the sides of the bowl as necessary (to prevent lumps from forming in the batter). Slowly add in the baking soda and flour, for a minute or two at your mixers lowest setting, until just incorporated. Using a wooden or plastic spatula, fold in the quick oats, M&M’s, chocolate chips and peanut butter chips.

Roll the dough, either by hand or cookie scoop, into 2 to 3  inch balls and line them up on each cookie sheet. Pop them into the oven and bake for 9-10 minutes: around 9 minutes for a softer cookie or 10 minutes for a slightly firmer cookie. I like a little bit of both so I tend to bake mine for 9-1/2 minutes.

After retrieving them from the oven, let them set up a bit more on the cookie sheet for another 5 minutes before gently transferring them to a cooling rack. Store in a airtight container for up to 5 days for maximum freshness. Or you can do what I always do, and eat them all, then and there. That’s the whole fun of baking after all, right? *wink*

Happy Baking, my friends! Hopefully, I’ll be back very soon with another stealthy recipe to share!

*Recipe adapted from sally’s baking addiction

Happiness Project Recipe #27: Mini Chocolate Chip Cookie Cheesecake Cups!

Image

With only 3 weeks to go before I hit 40 weeks in my pregnancy, I have this unexplainable feeling that next week might be THE week! Within this past week, I’ve been a bundle of nervous, anxious, excited energy & this unexpected onslaught of emotions has left me feeling a bit off balance. All of a sudden, something akin to fear hits me. All predominately based on very normal parenting uncertainties. Will I be a good Mother? Do I have what it takes to be everything that my little girl truly needs? Fortunately, I’m sensible enough to know that most first time, new moms feel like this, to various degrees. That’s simply how life is when embarking on a mementos new adventure. The most important adventure a person can possible begin: that of becoming a parent. So in lieu of all of my jumpy emotions, I wanted to squeeze in one more recipe before what I suspect might be THE big week. And since one of my very first pregnancy cravings was for a classic vanilla bean cheesecake, I decided to end (temporarily) on a similar note. With cheesecake, in my favorite dessert form: a cupcake. Although I had originally planned on using mini chocolate chips within the recipe, I ended up settling for standard sized chocolate chips instead, after discovering a sadly diminished lack of mini chocolate chips in my baking cabinet (tis a sad day, indeed). Overall, using a standard sized chocolate chip certainly did not take anything away from the desired taste. If anything it packed an even heftier punch of chocolate, which isn’t actually a bad thing, right? So here it is…

Crust:

1 cup graham cracker crumbs

2 tablespoons brown sugar

pinch of kosher salt

3 tablespoons salted butter, melted

Cheesecake:

8 ounce package of cream cheese, softened at room temperature

2 tablespoons sour cream

1/3 cup granulated sugar

1 egg

1 teaspoon vanilla extract

1/2 cup mini chocolate chips

Preheat your oven to 350F. Line 12 cupcake tins with paper baking liners.

In bowl #1, mix together the graham cracker crumbs with the brown sugar and salt until well combined. Pour in the melted butter and mix with your fingers until evenly coated and crumbly.

In a 2nd large bowl, on a stand mixer, cream together the cream cheese, sour cream and sugar until smooth, scraping down the sides of the bowl to prevent any lumps in the batter from forming. Beat in the egg and vanilla extract until well combined. Set aside.

In your cupcake pan, scoop up about 1-1/2 tablespoons of the graham cracker crust into each paper liner, pressing the crumbs down into a nice, even layer. Now, evenly divide the cheesecake batter between the cupcake liners, pouring the batter over the graham cracker bottom, filling each liner nearly to the brim. Sprinkle however many mini chocolate chips over the top of the cheesecake batter as you desire.

Bake for 18-21 minutes until the tops are nearly completely firm to the touch. Remove the cupcake pan from the oven and cool on a wire rack for about an hour before popping them into the refrigerator for another 2 hours to let them set up correctly. When not serving immediately, store in a airtight container in your refrigerator for up to 3 days.

Happiness Project Recipe #26: Funfetti Birthday Cookies!

Image

Oh birthdays! For the most part, I’m usually quite apathetic towards birthdays. To me, age is just a number, nothing more, nothing less. I don’t live my life by my age, I live my life by my heart, as corny or sappy as that may sound. So whenever February comes around, turning one year older doesn’t usually inspire an overwhelming need for any unnecessary personal validation. However, there is one thing that I truly love about birthdays. Dessert. Be it in the form of a cake, cookie or cupcake, I MUST have my birthday dessert. Nothing else matters more to me than that one, sugary, bite-full of yummy, blissful sweetness. Seriously, nothing. So to celebrate turning 35, I decided that pudding and sprinkles was exactly what I needed most. And since lately the cookie monster within me has been consuming nearly everything in sight, funfetti cookies seemed perfect for the occasion. And what a fun and easy recipe this is!

3/4 cup salted butter, softened at room temperature

3/4 cup brown sugar

1/4 cup granulated sugar

1 (3/4 oz) package instant vanilla pudding mix

3/4 cup yellow cake mix, dry

2 eggs

1 teaspoon vanilla

1 teaspoon baking soda

2-1/4 cup all-purpose flour

1/2 teaspoon kosher salt

Handful of sprinkles

Preheat your oven to 350F.

In a medium sized bowl, stir together the flour, baking soda and salt. Set aside.

On a stand mixer, cream the butter and sugars together until light and fluffy.

Add in the cake mix and package of dry, vanilla pudding until well blended.

Add in the eggs and vanilla and mix well.

Slowly add in the flour mixture, scraping down the sides of the mixing bowl to eliminate any lumps from forming in the batter.

Mix in that handful (or two) of sprinkles.

Using either a cookie scoop or rolling by hand, drop 1-1/2 inch dough balls onto a sprayed or Silpat lined baking sheet.

Bake for 10-12 minutes before removing from the oven and cooling on a wire rack.

See? Very quick, easy recipe! Kid friendly too *wink*


Happiness Project Recipe #25: “Thank You” Peanut Butter Cup Chocolate Cookies!

Image

As a THANK YOU to my husband, twin sister and closest girlfriend for painting Arianna’s nursery room yesterday, I found myself in the kitchen at 2am whipping up a new chocolate cookie recipe (oh the joys of pregnancy insomnia). With Reeses Peanut Butter Cups. And so you ask, “ANOTHER recipe involving chocolate and peanut butter??” But of course! Who would I be without some chocolate involved? *wink* And no, I’m not hesitant at all about expressing my adamant LOVE for this plump, decadent morsel! This is by far one of the best chocolate cookies I’ve ever tasted! Now I’m sitting here staring at a tupperware container half filled with these peanut buttery swirled beauties while unsuccessfully attempting to restrain my hungry, pregnant self from consuming them all in one mere sitting. This is not an easy thing to do, my friends. Not at all. So in an attempt to feel less guilty about my obsessive tendencies towards gleeful, unbridled consumption, now it’s your turn…

1-1/2 cups all purpose flour

6 tablespoons unsweetened cocoa powder

1/2 teaspoon baking soda

1/2 teaspoon kosher salt

6 tablespoons unsalted butter, softened at room temperature

1/2 cup creamy peanut butter

1/2 cup granulated sugar

1/2 cup brown sugar

1 egg

1 teaspoon vanilla extract

2 tablespoons whole milk

1-1/2 cups coarsely chopped frozen peanut butter cups

Preheat your oven to 350F. Line 2 baking sheets with Silpat baking mats or parchment paper. Freeze your 1-1/2 cups peanut butter cups for 30 minutes before chopping them up with a serrated knife into small pieces. They will be much easier to handle when frozen.

In a large mixing bowl, combine the flour, cocoa powder, baking soda and salt. Stir to combine. In another large bowl on a stand mixture, beat the butter, peanut butter and sugars until light and fluffy. Blend in the egg, vanilla extract and milk until smooth. Mix in the dry ingredients until just combined. Gently fold in 3/4 cups of the chopped peanut butter pieces.

Using either a cookie scoop or rolling by hand (I always roll my cookies by hand), drop 1 to 1-1/2 inch dough balls onto your lined cookie sheets. Gently press in the remaining 3/4 cups of chopped peanut butter pieces into the top of each dough ball (FUN!!). Bake for 12-14 minutes.

Remove from the oven and let cool on a wire rack before serving or store them in an airtight container (for up to 3 days).

Drooling yet? *wink*

Happiness Project Recipe #24: Lemon Cream Sugar Cookies!

Image

Since Lemon just happens to be my 2nd favorite dessert flavor, I knew that I just HAD to create a new Lemon recipe for my family’s 2012 Christmas gathering! Particularly since my Mom was the very person who first turned me on to this lovely, citrus filled delight many a year ago. So casting aside my usual chocolate drenched ambitions, I finally tried my hand at a new sugar cookie recipe. One in which I joyfully incorporated my all time favorite indulgence: frosting! Although the 1st trial run with a classic buttercream frosting turned out quite well, the superior frosting snob that I am simply could not settle for anything less than absolute perfection. Hence this now pleasantly altered buttercream recipe, featuring cream cheese as it’s star flavor! The result? Sugar cookie perfection.  At least I think so.

Cookies:

1/2 cup salted butter, softened at room temperature

1/2 cup butter flavored crisco

1 cup granulated sugar

1 teaspoon vanilla extract

1 egg

2 tablespoons lemon zest (approximately 2 lemons)

2-1/2 cup all purpose flour

pinch of kosher salt

1/2 teaspoon baking soda

1 tablespoon whole milk

1 tablespoon lemon juice

Frosting:

1/4 cup salted butter, softened at room temperature

8 oz cream cheese, softened at room temperature

1/2 teaspoon vanilla extract

2 cups confections sugar, sifted

pinch of kosher salt

2 tablespoons lemon juice

Preheat the oven to 350F.

In a large mixing bowl on a stand mixer, cream the butter, crisco and sugar until light and fluffy (2-3 minutes on medium speed). Mix in the vanilla, egg and lemon zest. In another bowl, sift together the flour, salt and baking soda. Add the dry ingredients into the wet mixture until just incorporated. Stir in the milk & lemon juice until well combined.

With a small cookie scoop, roll your dough into 1 to 1-1/2 inch balls, placing them on a Silpat lined or lightly sprayed cookie sheet. Using either your fingers-tips or a spatula, gently press each dough ball flat. Bake for 10-12 minutes until the edges begin to brown ever so slightly. Remove from the oven and cool on a wire rack.

Onward to the frosting! In a large mixing bowl, on a stand mixer, beat the butter and cream cheese together until smooth and glossy. Slowly beat in the vanilla extract. Add in the confections sugar and salt until well combined. Last but not least, stir in up to 2 tablespoons of the lemon juice.

And now to what you’ve all been waiting for: frosting these heavenly bite sized cookies! As with anything involving frosting and cookies, decorating can be as messy or as pretty as you so chose it to be. Using either a spoon, a butter knife or even a pastry bag fitted with a large round decorating tip, frost, frost, frost away! And don’t forget to add in your favorite colored sprinkles! Sprinkles make everything better =)

Happiness Project Recipe #23: Cookies & Cream Cheesecake!

Image

Oh cheesecake! Oreo. Cheesecake. The best of both worlds combined into one tasty, decadent bite! During my 1st trimester, one of my daily cravings was the single serving vanilla cheesecake from Jack In The Box. A craving which I couldn’t help but indulge in far more often than what was technically considered healthy. So even now at 31 weeks, it’s no surprise that I’ve once again become a wee bit obsessed with this one particular dessert. Hence this new, very fun recipe. With Oreos. Did I mention Oreos? *wink* The ONLY downside to this yummy, drizzled concoction? These little niblets are almost too decadent for single mass consumption. Trust me. I know. Don’t believe me? Try these. I dare you.

36 Oreo Cookies (24 for crust bottom, 12 for cheesecake batter)

1/4 cup salted butter, melted

4 (8) ounce packages of cream cheese, softened at room temperature

1 cup granulated sugar

1 cup sour cream

1 teaspoon vanilla

4 eggs

1/2 cup milk chocolate chips (for drizzle garnish)

Preheat your oven to 325F. Line a 9×13 inch baking pan with aluminum foil,  leaving enough side foil to hang over the edges of the pan.

Finely crush up 24 Oreos for the crumb bottom. Melt the butter in a microwave safe bowl and then mix well with the crushed Oreos. Press the mixture onto the bottom of the pan. Yes, this will be quite sticky so have patience while gently and firmly pressing out the entire mixture, making sure to create nicely formed edges at each corner.

For the cheesecake batter, using a large bowl on a stand mixer, beat the cream cheese and sugar until fully incorporated. Blend in the sour cream and vanilla. Add the eggs, one at a time, scraping down the sides of the bowl with a spatula after each addition. Roughly crush or chop up the remaining 12 Oreo cookies and gently fold them into the batter. Now pour the batter over the cookie crust.

Bake the cheesecake for 35-40 minutes, until the edges are firmly set and the center is nearly fully set. Cool on a wire rack for at least 1 hour before covering with plastic wrap and chilling in the fridge for 2-1/2 to 3 hours. Once the cheesecake is sufficiently chilled, take the cheesecake from the fridge and remove from the pan, using the foil overhang. Using a small pairing knife, cut up the cheesecake into whatever desired sized pieces you want. Set the cut pieces onto a parchment or Silpat lined baking sheet: you might get a wee bit messy with the chocolate drizzle.

For the drizzle, heat up the chocolate chips in a microwave safe bowl until fully melted. Using either a pastry bag with a small, round decorating tip or a Ziploc bag (sniped at the bottom corner), pour the chocolate into the bag and drizzle as much or as little onto the cheesecake pieces as your hungry heart desires.

If not serving immediately, cover with plastic wrap and chill in the fridge until ready for consumption. Mass consumption. Party-worthy consumption.

Your friends and family will worship you forever for this!

Happiness Project Recipe #22: Classic Crumb Coffeecake!

Image

After taking an unexpectedly long blog hiatus (& then being swarmed by friends inquiring about all of the holiday recipes I’d created), I’m finally back! Since most of Decembers Christmas baking consisted of cookies, cupcakes and more cookies, I couldn’t help but cave in to my longing for a good new cake recipe. And since coffeecake has always been one of my favorite cafe foods, crumb coffeecake became my first most priority! Although I was a little light handed on the cinnamon-cocoa filling, I was quite pleased with this very classic crumb recipe. So here it is, with all of it’s yummy, crumbly goodness…

Crumb topping:

1 1/4 granulated sugar

1 1/2 all purpose flour

1 tablespoon ground cinnamon

6 tablespoons salted butter, melted

Cinnamon Filling:

1 cup brown sugar

1 1/2 tablespoons ground cinnamon

1 teaspoon cocoa powder

Cake:

3/4 cup salted butter, softened at room temperature

1 1/2 cups granulated sugar

1/3 cup brown sugar

2 1/2 teaspoons baking powder

2 teaspoons vanilla extract

3 large eggs

3/4 cup sour cream

1 1/4 cups whole milk

3 3/4 cups all purpose flour

Preheat your oven to 350F. Lightly butter two 9inch round cake pans.

To make the crumb topping, whisk togther the sugar, flour and cinnamon. Add in the melted butter, stirring until well combined and crumbly. Set aside.

For the cinnamon filling, using another medium bowl, stir together the brown sugar, cinnamon and cocoa powder. Set aside.

Now for the cake! In a large mixing bowl, on a stand mixer, beat the butter, sugars, baking powder and vanilla extract until well combined and smooth (2-3 minutes). Add the eggs, one at a time, beating well after each addition.

In another bowl, whisk together the sour cream and milk until well mixed.

Now, add the flour mixture into the butter mixture, alternating with the sour cream/milk mixture, in 3 batches, until just combined. Remember to scrape down the sides & bottom of the bowl with a rubber spatula in-between each alternating batch (to prevent any unmixed lumps from forming).

Pour the  equivalent of 1 1/3 cups cake batter into each round cake pan, spreading the batter evenly all the way out to the sides of each pan.

Evenly spoon all of the cinnamon filling over the cake batter, sprinkling all the way to the pans edges.

Spread out the remaining batter on top of the filling. Using a spoon or butter knife, gently swirl the batter together with the filling, in a circular motion.

Last but not least, sprinkle the crumb topping over each cake, using as much or as little as you like. I only used half of the total crumb topping for mine.

Bake both of your round cakes for 50-55 minutes, until the edges start to bubble up slightly and a toothpick inserted in the center of each cake comes out clean.

Remove from the oven and let cool on a wire rack for a good 15-20 minutes before cutting up and serving, straight from the pan. If only consuming 1 cake per sitting, cover the 2nd cake pan with plastic wrap and store in the fridge for up to 3 days.

Want to add a little extra kick to each serving? Drizzle some melted semi-sweet chocolate over each cake slice or better yet, serve with a scoop of lovely vanilla ice cream. Yumminess!

Happiness Project Recipe #21: Sweet Pea’s Nutella Banana Bread!

Image

If you’ve never had chocolate with your banana bread, then you’re missing out on life, my friends! Not only does it make for a gloriously messy kitchen experience but your house will smell just like Christmas! Mine did and I was nearly frothing at the mouth like a mad woman because of it! The hardest part of baking up this recipe was the waiting. Waiting for those darn bananas to be just ripe enough to mash up into gooey little bits. Point in case: I had to wait NINE days for mine to be the perfect shade of brown. Not an easy thing to do when it’s not quite the right season for quick and easy ripeness (and you’re a very hungry, impatient pregnant woman). Happily, this yummy concoction of bananas, nuts and (almost too much) chocolate made the wait well worth it! So here you go…

2 cups all-purpose flour

3/4 cups sugar

1 teaspoon baking soda

1/2 teaspoon kosher salt

3 ripe bananas

1/4 cup plain yogurt

2 eggs, lightly beaten

6 tablespoons unsalted butter, melted

1 teaspoon vanilla extract

1/2 cup Nutella Chocolate Spread

* 3/4 cup finely diced walnuts (optional)

Preheat your oven to 350F

Butter 2 small loaf pans. Line with parchment paper, butter again and then lightly dust with flour, tapping out the excess.

In bowl #1 combine the flour, sugar, baking soda and salt. Mix well.

In a 2nd large bowl, combine all three well mashed bananas (I use a fork to mash them up nice and good!), yogurt, eggs, butter and vanilla extract, mix gently. Slowly add the wet mixture (bowl #2) to the dry mixture (bowl #1) and gently stir until all of the flour mixture is absorbed. Your batter will be quite lumpy, but never fear, that’s the way it should be! If using walnuts, fold them into the batter with a wooden spoon or rubber spatula.

Next, warm up the Nutella in a microwave safe bowl in two 15 second intervals, until the chocolate is silky smooth.

Now, the really messy, fun part! Scoop out half of the banana batter into the two loaf pans, divided equally between the two. Spoon out half of the melted Nutella onto the batter in each pan and stir in a circular pattern with a spoon. Pour the rest of the banana batter into each loaf pan, finishing up yet again with another layer of the remaining Nutella chocolate.

Pop those 2 pans into the oven and bake for 30-35 minutes until the tops are a lovely golden brown. Just a warning, your house will smell very, very yummy while these lovely loaves are rising. So resist, my friends. Good things come to those who wait =) Once that timer goes off, remove your pans from the oven and let cool on a wire rack for a good 30 minutes before extracting them from their pans.

Now, serve, share and enjoy!  Though I dare you to overcome that pestering urge to hoard the entire loaf for yourself! I certainly wanted to! *wink wink*